Quick Overview
This page gives you a visual and fast walkthrough of how Caramel works — from receiving an order to final pickup, with a quick look at accounting.
The explanations here are intentionally brief and meant for overall understanding.
Each section includes links to its dedicated help page where you can find detailed instructions.
Order Lifecycle at a Glance
After logging into Caramel, you are usually redirected to the Orders module.
The full order lifecycle is divided into five main stages, represented by five fixed buttons that are always visible at the top of all Orders pages.
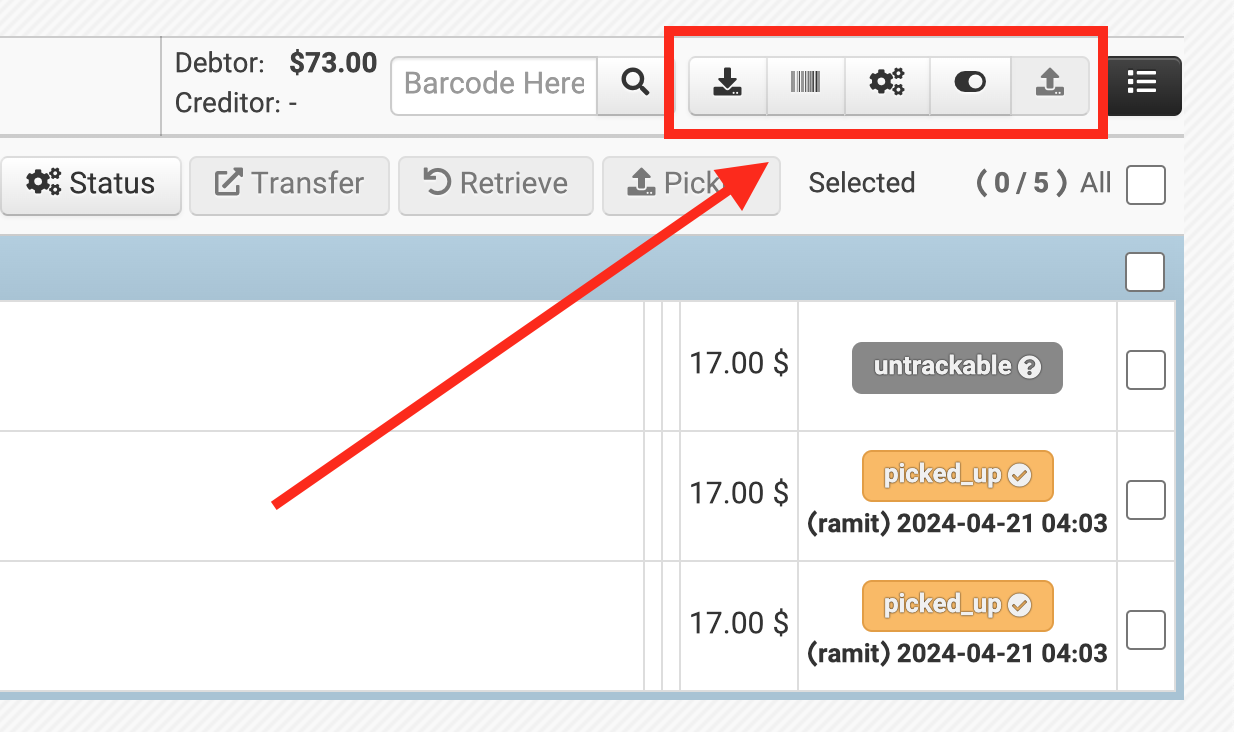
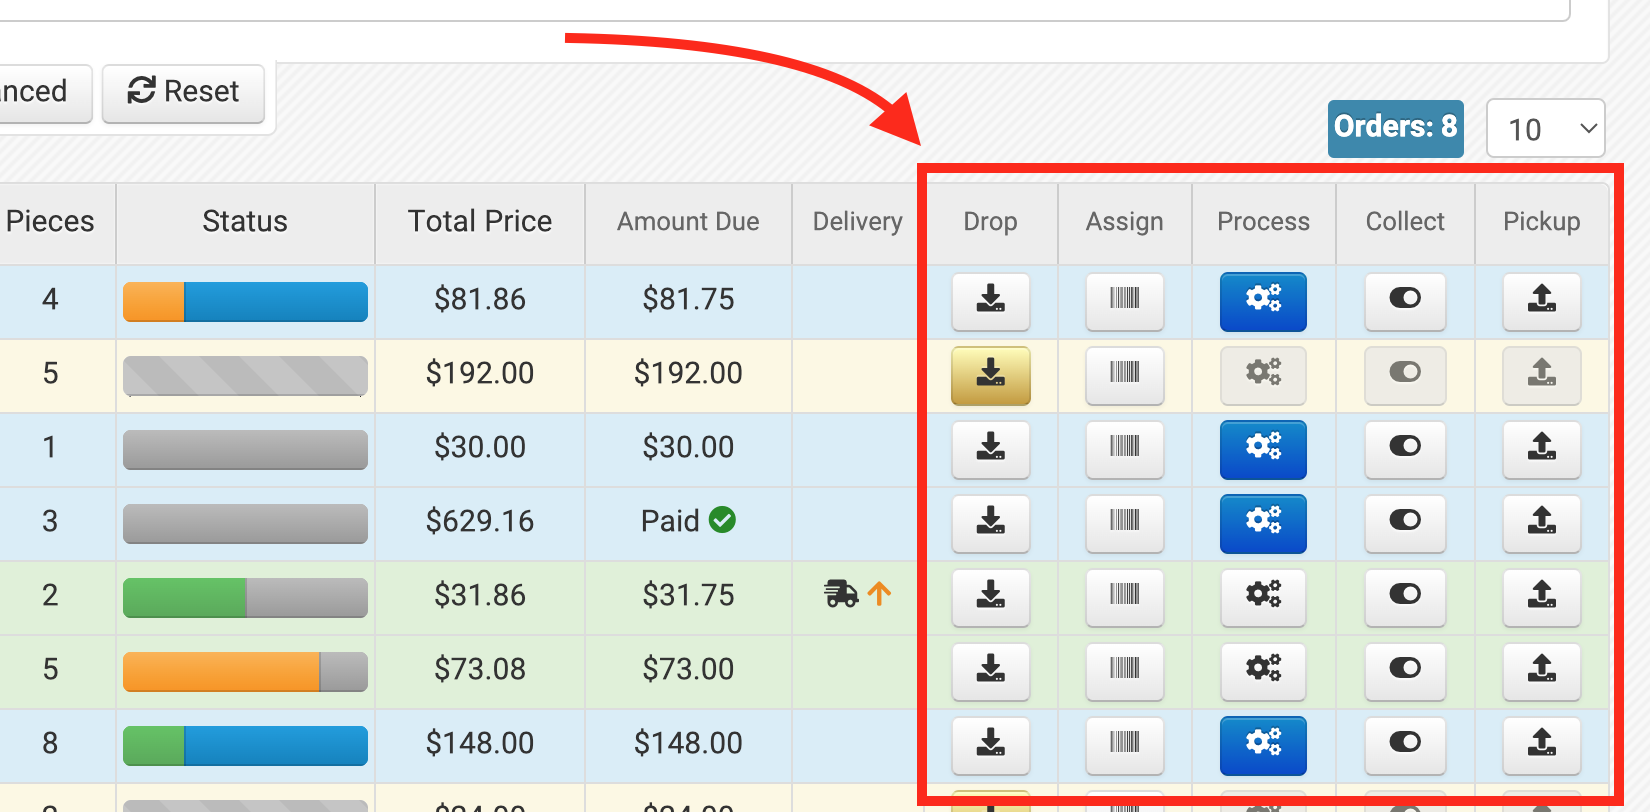
We won’t cover search filters and reporting options here.
Those are explained in detail in the Orders Management section.
Creating a New Order (Drop)
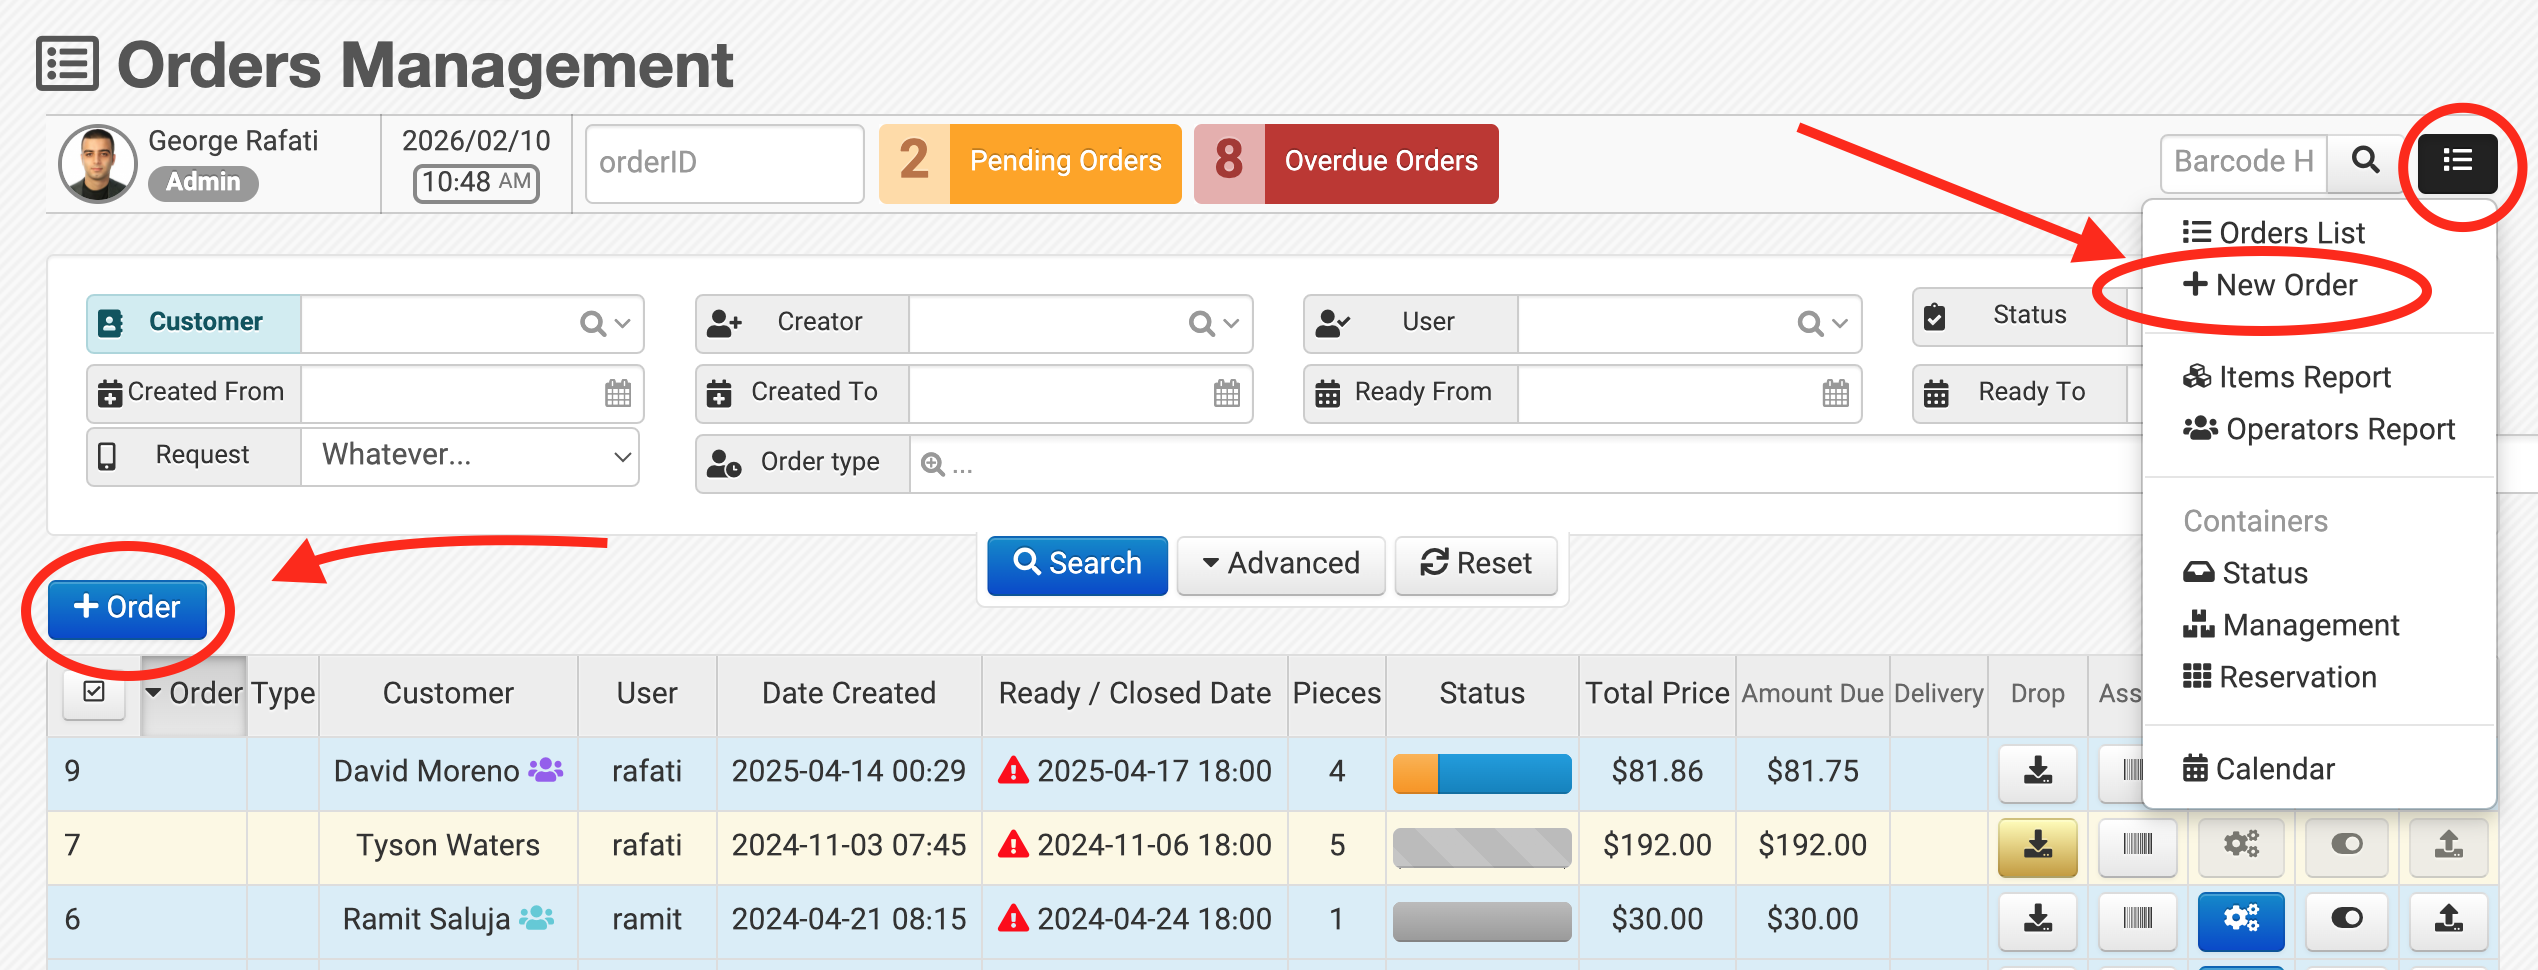
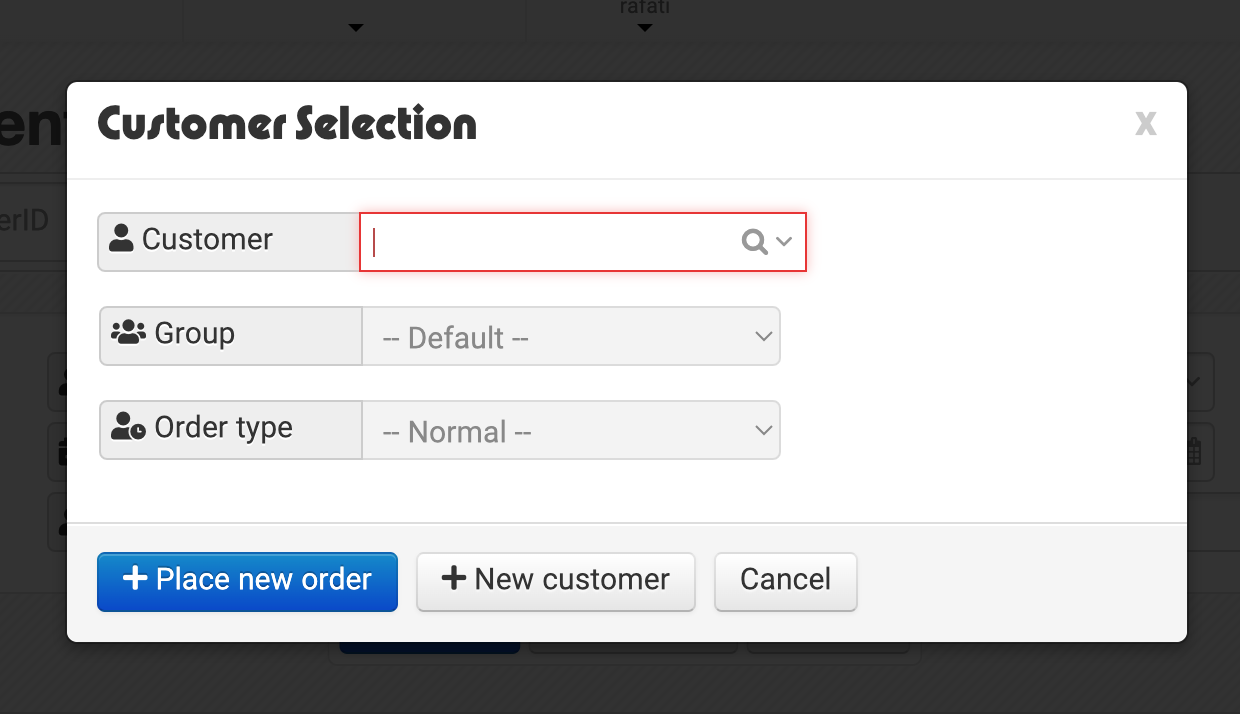
To create a new order, click + Order and select an existing customer or create a new one.
You will then enter the first stage: Drop.
The Drop page consists of five main columns, arranged from left to right:
- Article Categories
- Articles
- Options (based on selected article)
- Operations (based on selected article)
- Result Summary
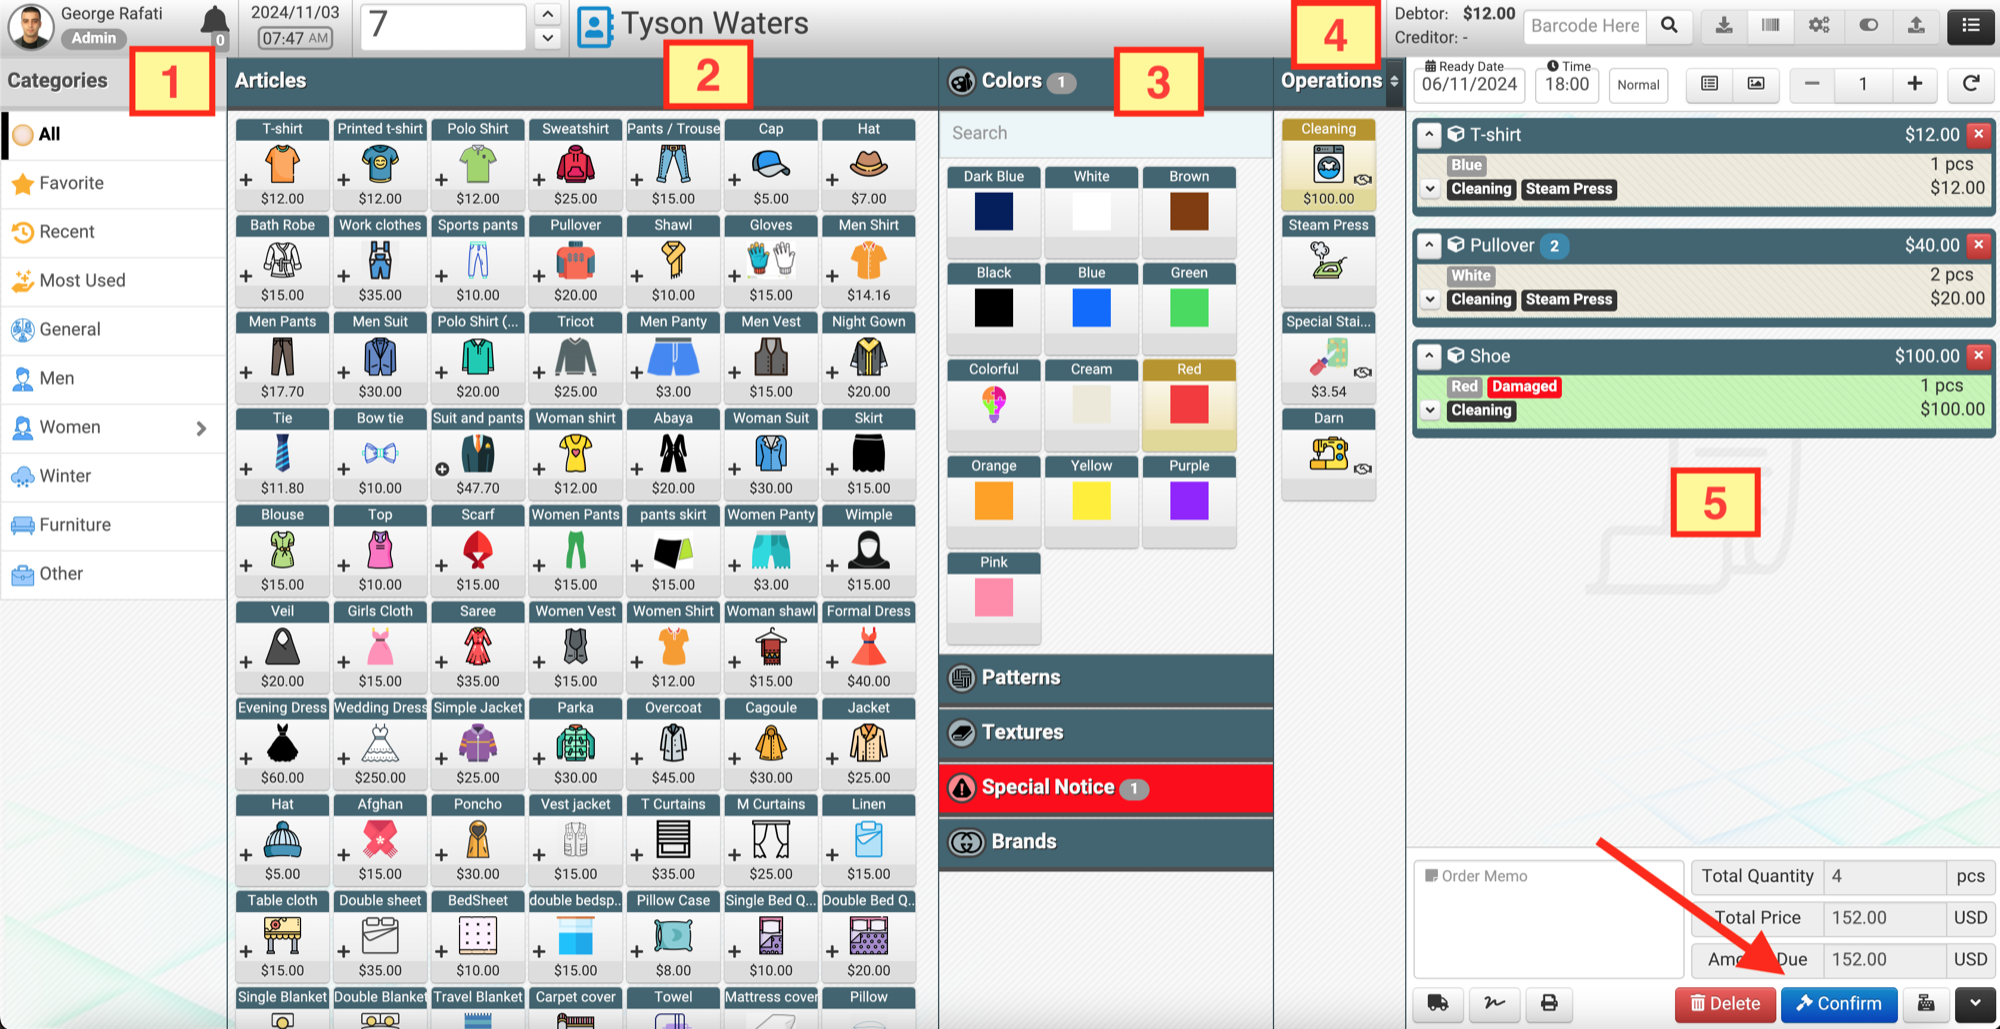
By selecting an article, its options, and operations, the final result is calculated and shown in the last column.
Once everything is ready, click Confirm to approve the invoice.
At this point:
- Payment and print buttons become available
- Barcodes can be assigned or printed
- The Process, Collect, and Pick-up stages become active
Learn more:
→ Orders › Drop
Assignation (Optional)
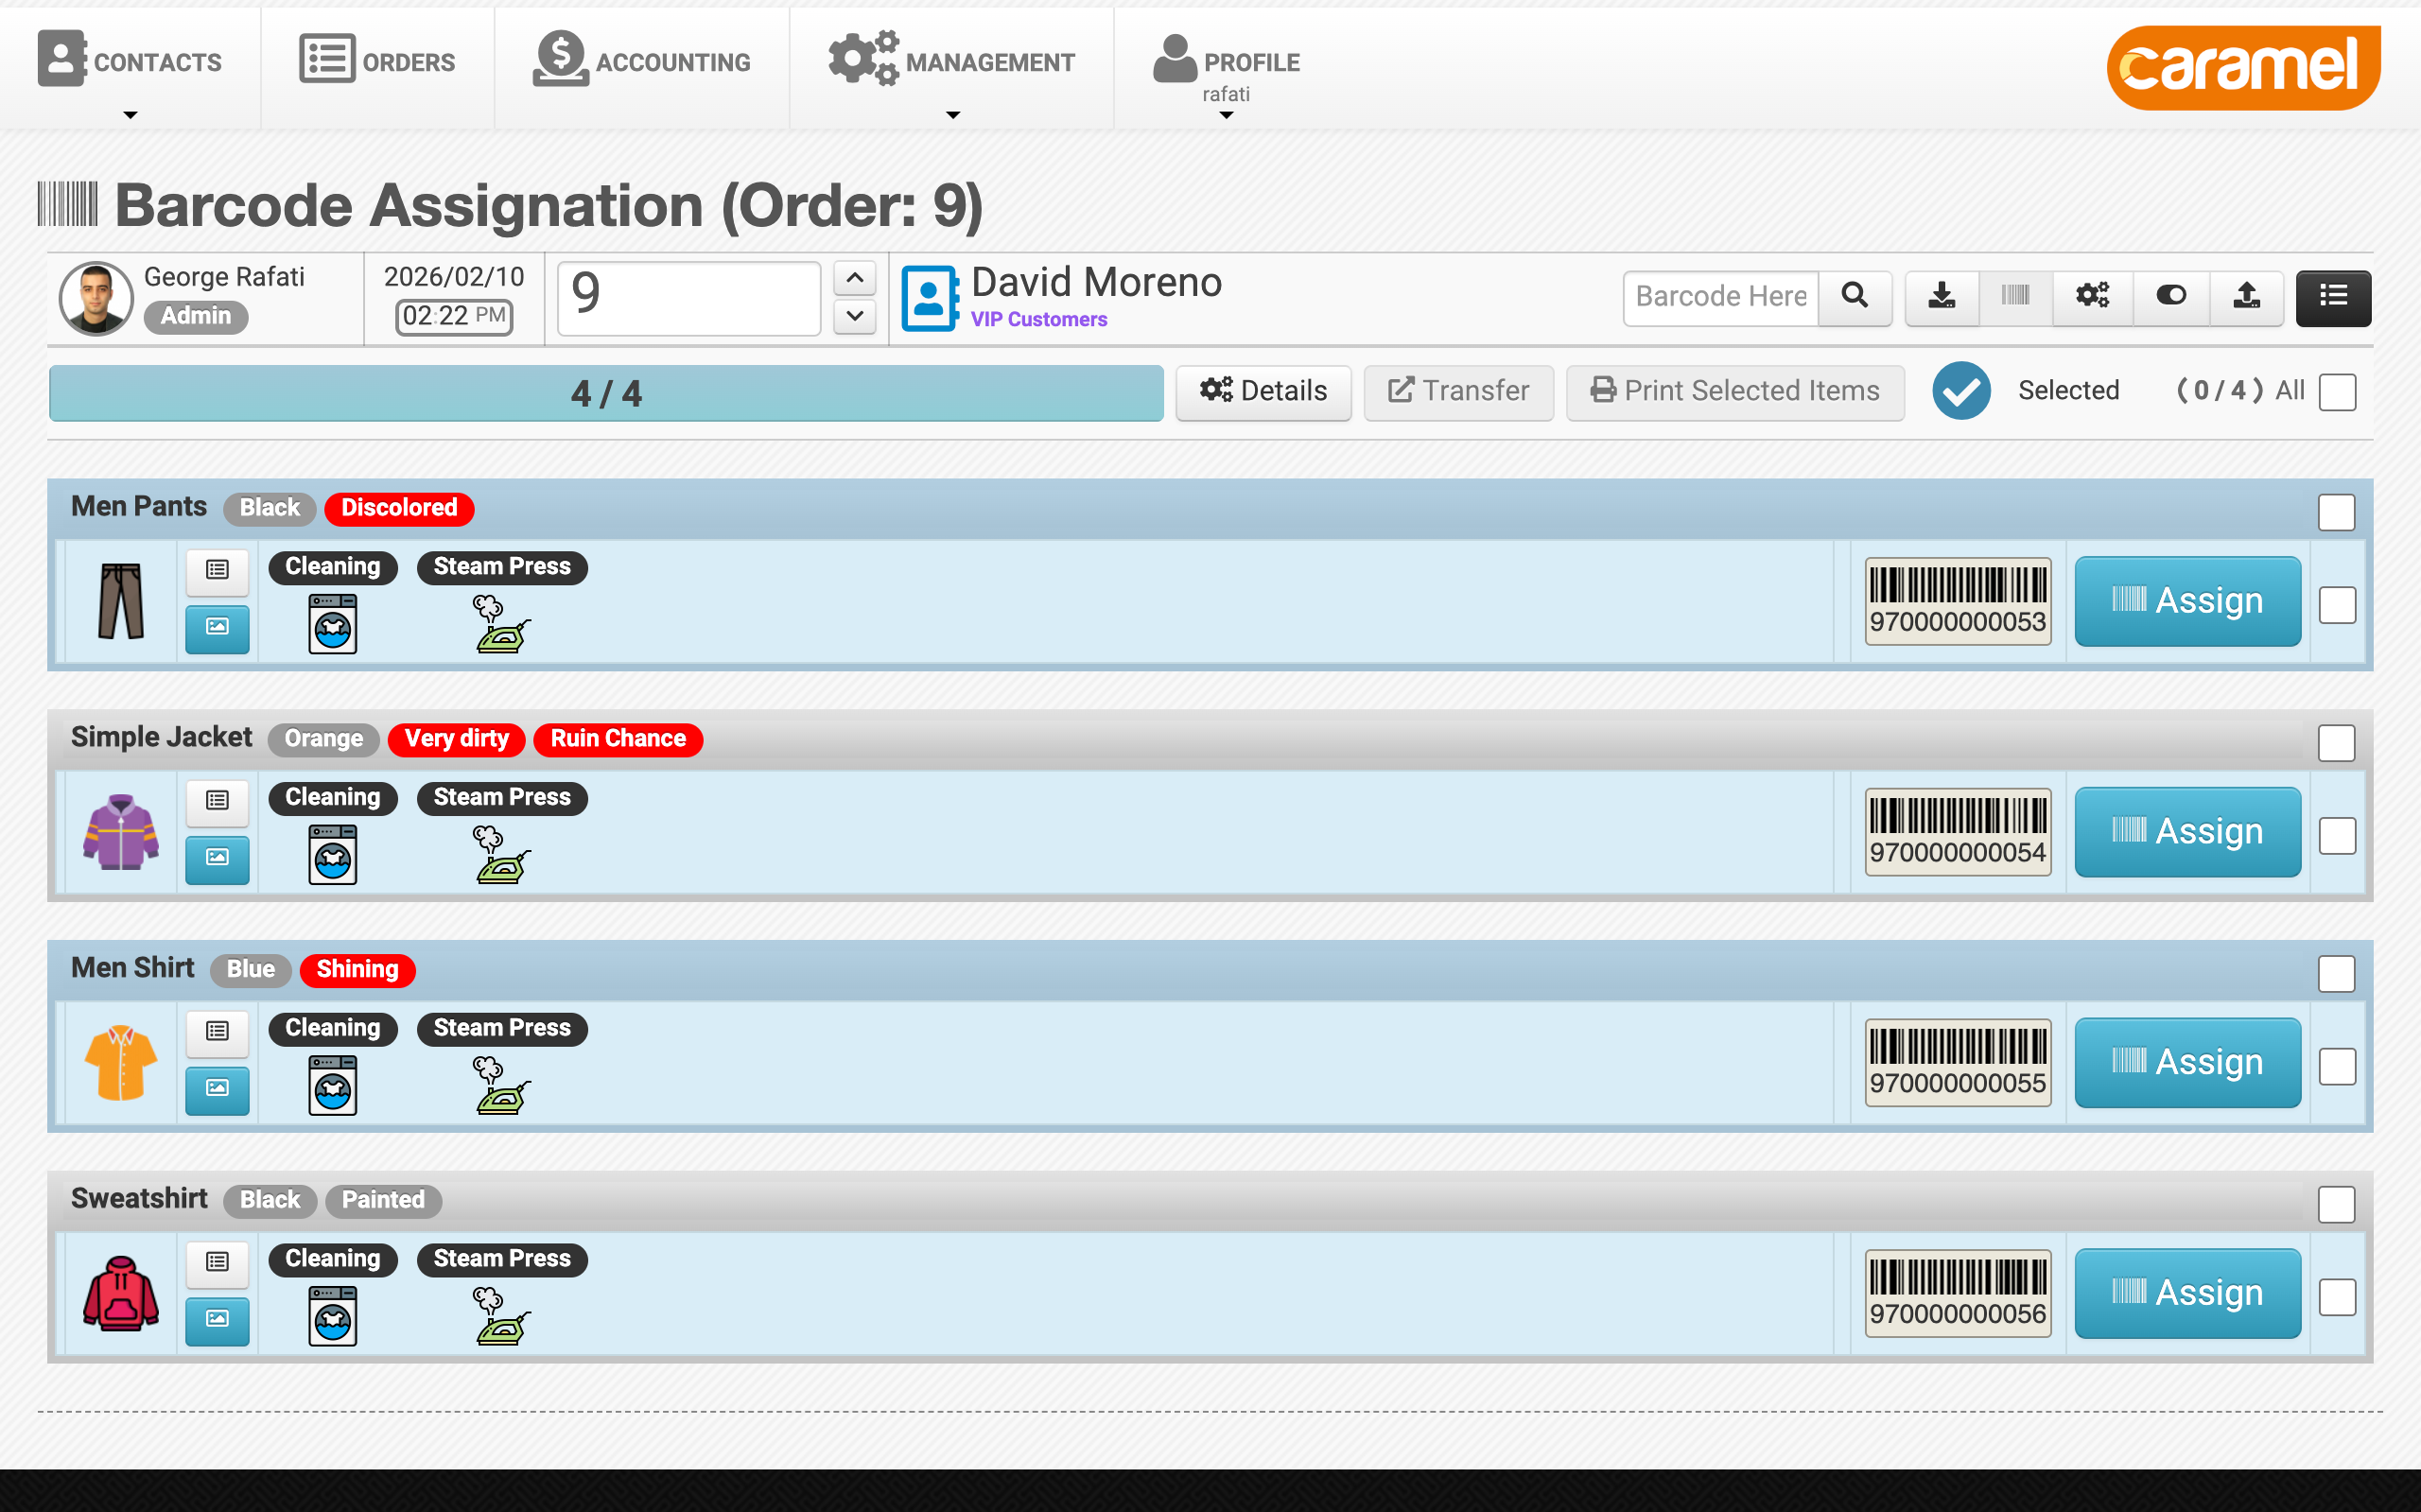
The Assignation stage is optional.
For faster workflows, barcodes can be assigned directly during the Drop stage, allowing you to skip this step entirely.
However, this section is useful when:
- Barcodes need to be edited or removed
- Businesses prefer separating order entry and barcode assignment
Learn more:
→ Orders › Assignation
Process (Workflow)
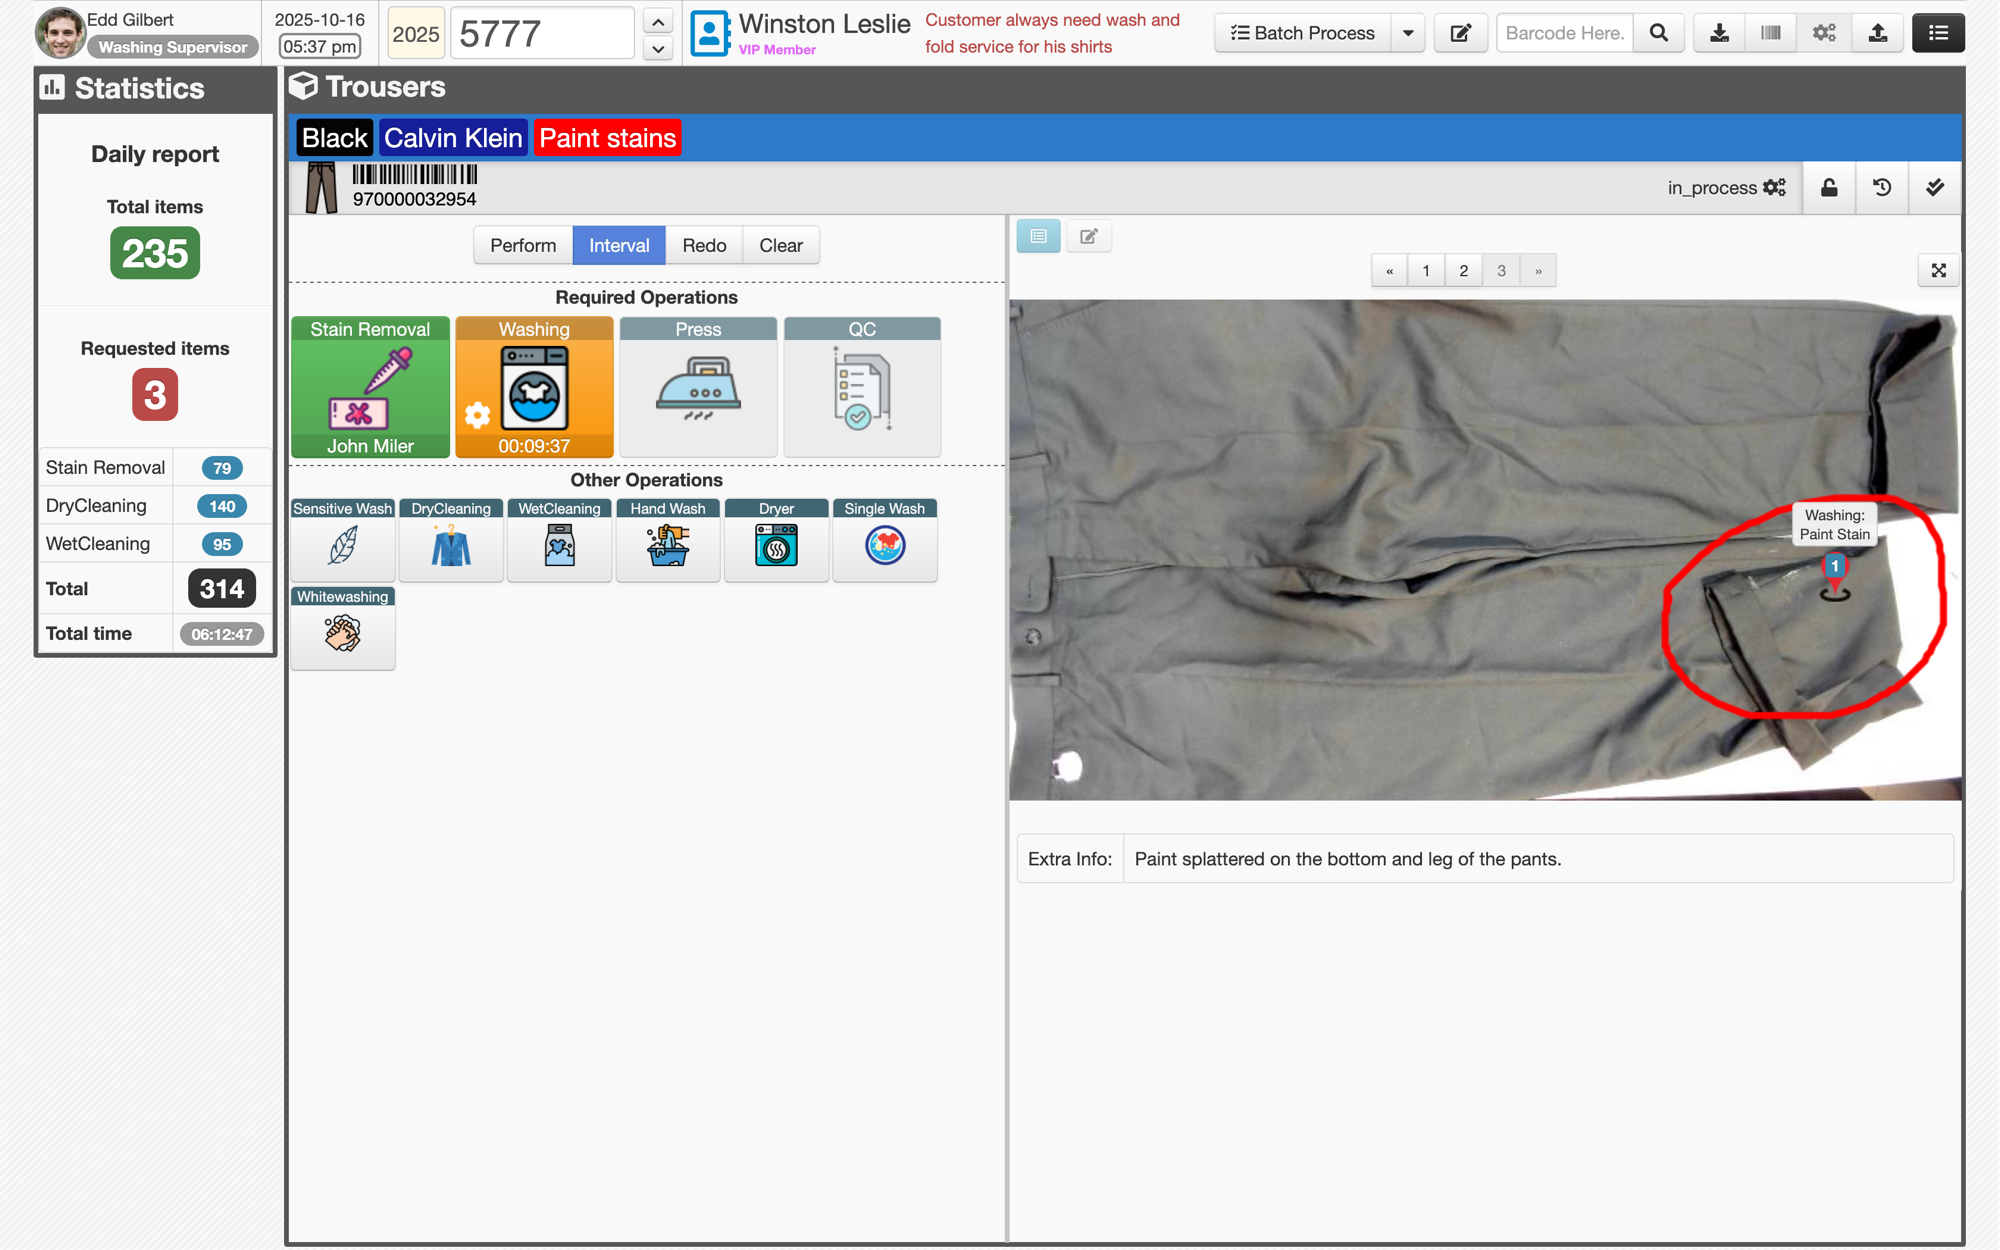
The Process stage represents your operational workflow.
This workflow is usually designed and configured by the Caramel support team, based on your business needs:
- Workflow steps
- Preconditions
- Error prevention rules
Operators simply:
- Scan an Item barcode to see its details
- Scan a command barcode to execute the required operation
Batch scanning is supported and optimized for speed.
Although all actions can be done using mouse or touch, barcode scanning is significantly faster.
Each Process workflow is customized for your business during onboarding.
Learn more:
→ Orders › Process
Collect (Quality Control)
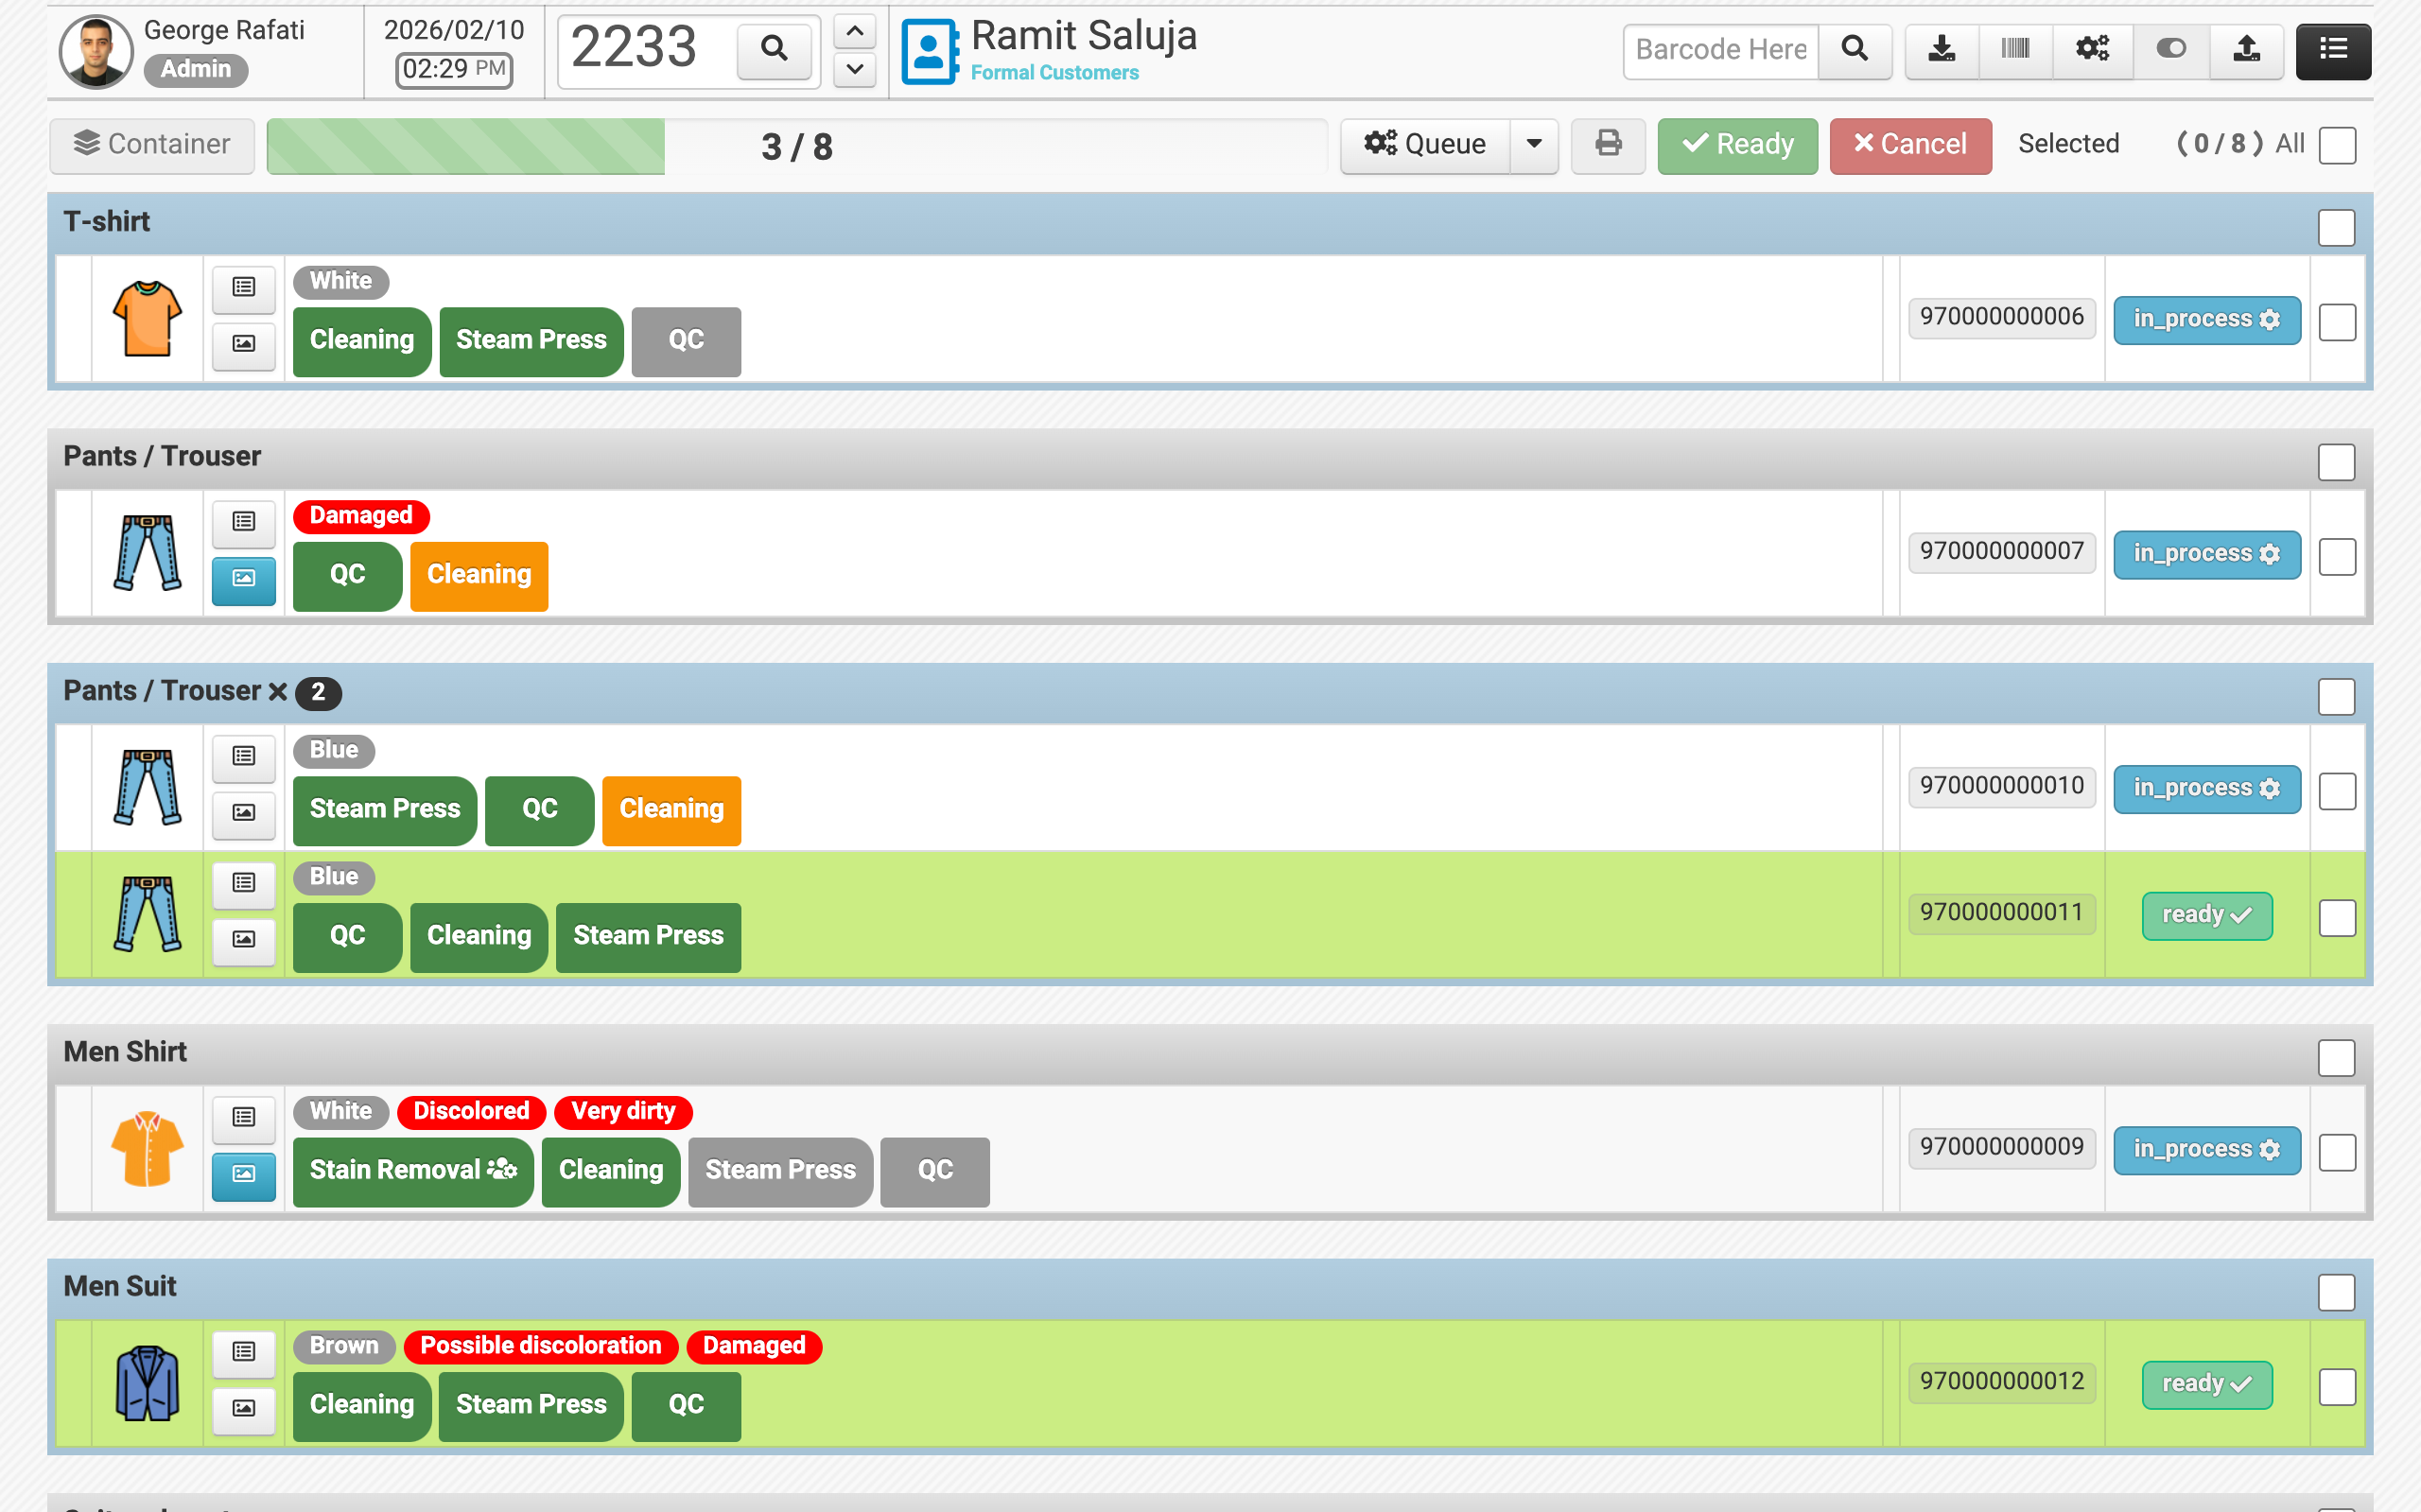
The Collect stage is the final step before an order is ready for pickup.
In this stage:
- Items are selected manually or via barcode scanning
- All actions are available as both buttons and barcode commands
- Final storage or staging locations can be assigned
The system displays visual and audio warnings if something is missing or incorrect.
A progress bar shows the overall readiness of the order.
Once completed, a “Ready” notification (such as SMS) can be sent to the customer.
Learn more:
→ Orders › Collect (QC)
Pick-up
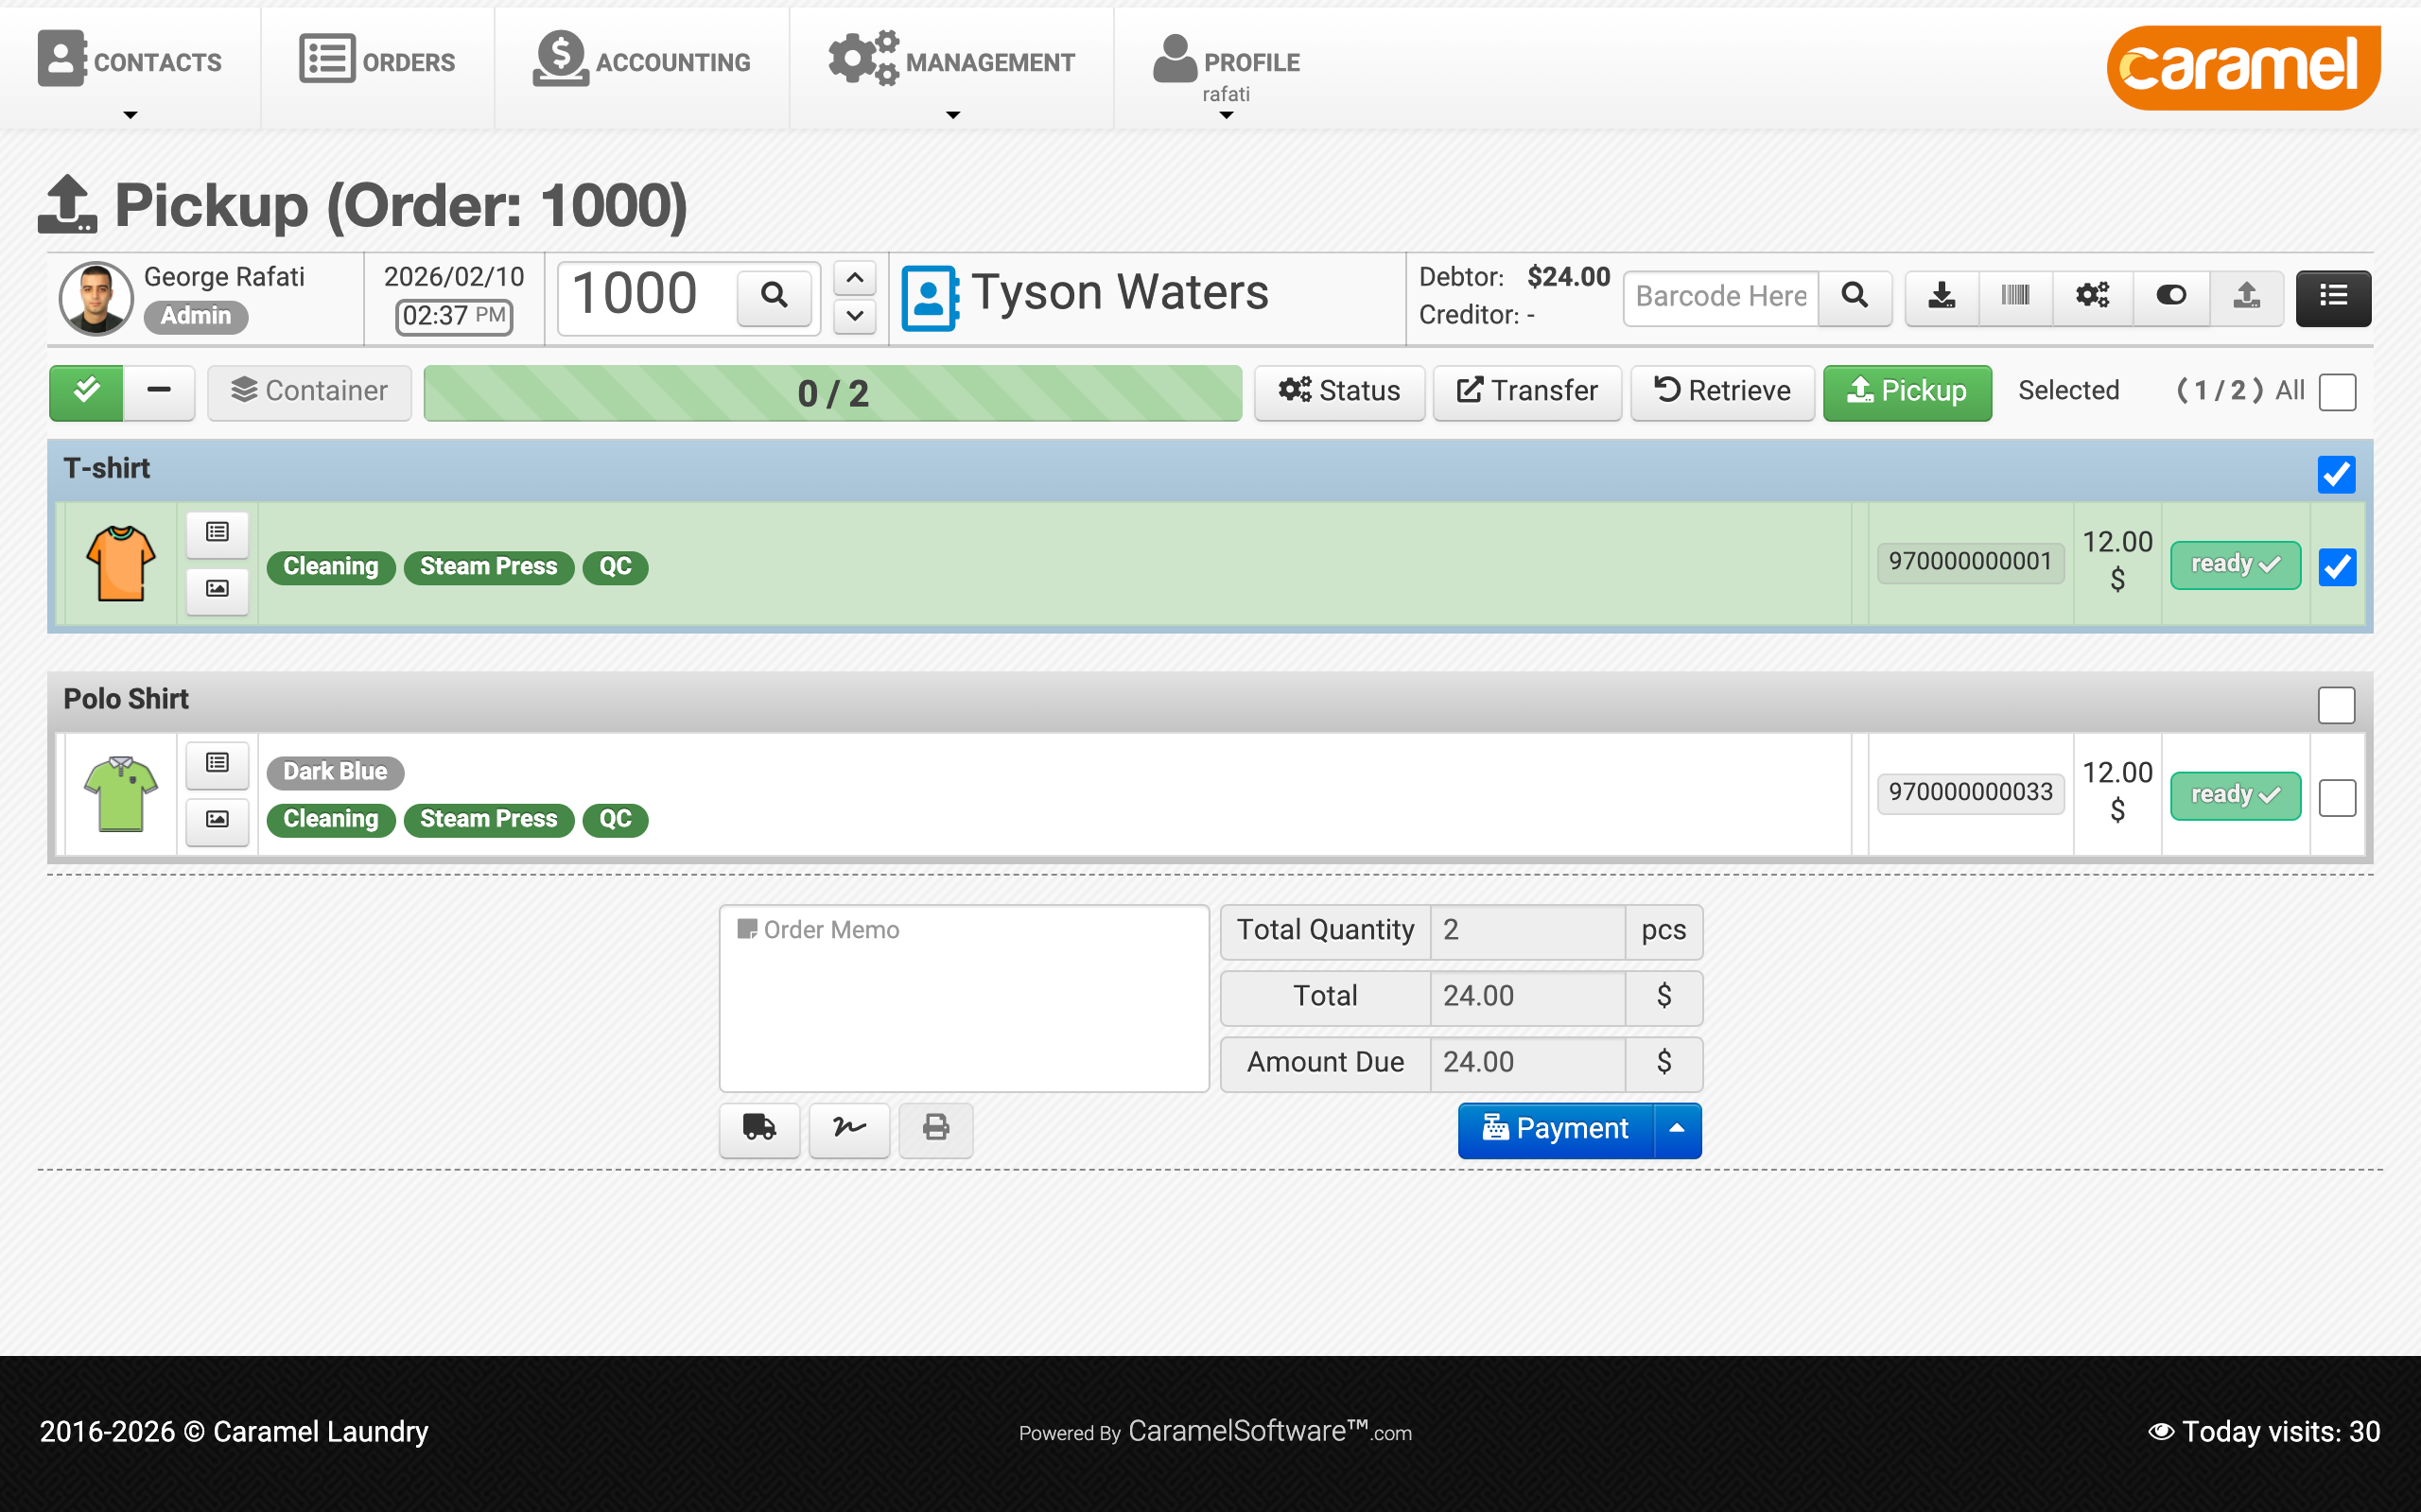
The Pick-up stage handles the final delivery of Items to the customer.
Similar to the Collect stage:
- Items are selected manually or via barcode
- Final delivery is confirmed by scanning or clicking the Pick-up button
To prevent human error, Caramel provides audio and visual alerts if a wrong Item is selected.
A Retrieve option is also available in case:
- A delivery mistake occurs
- An Item needs to be returned
- The reason for incomplete delivery must be recorded
Payment and print options are also available on this page.
Learn more:
→ Orders › pickup
Accounting Overview
The Accounting module includes a secondary top menu dedicated to accounting navigation.
Pay close attention to this menu — it’s essential for moving between accounting pages efficiently.
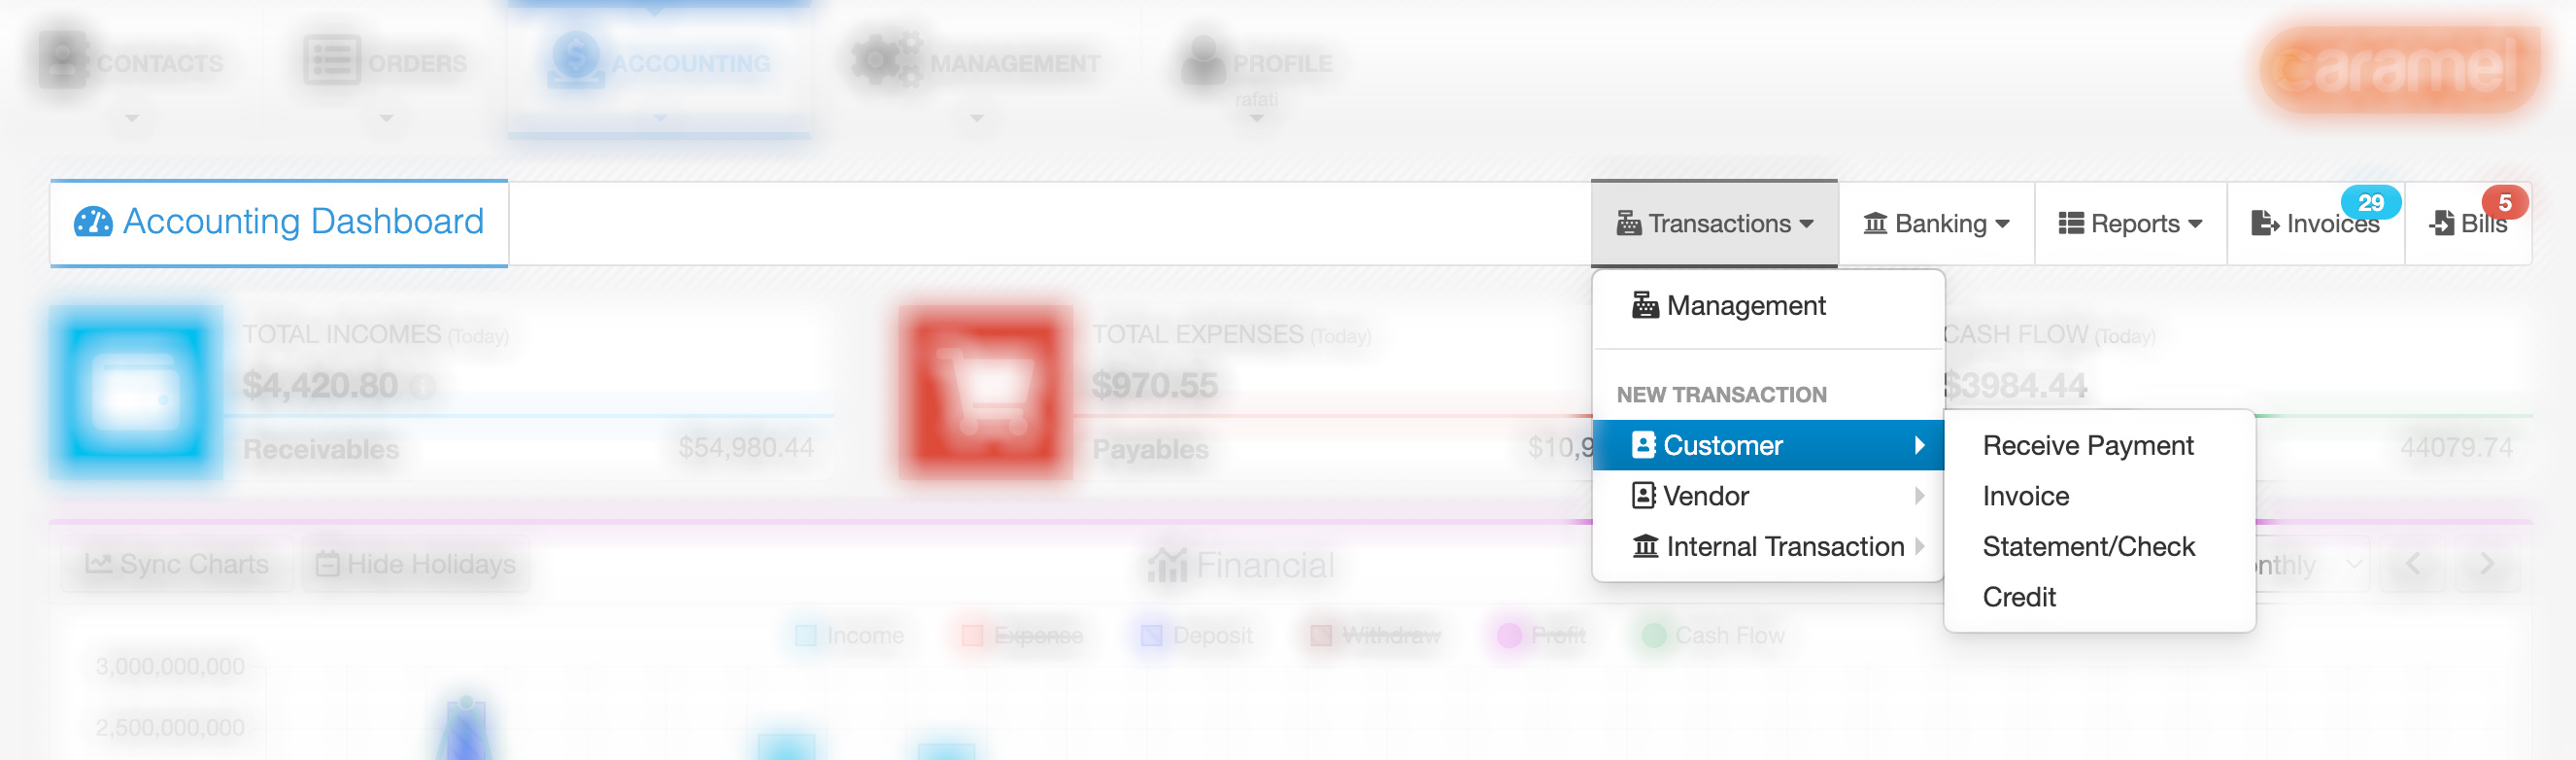
At its core, accounting in Caramel is based on Transactions.
For detailed financial reports:
- Go to Transaction → Management
- Apply the required filters
Many high-level insights are also available directly on the dashboard as charts.
Learn more:
→ Accounting › Transactions
Accounting Dashboard
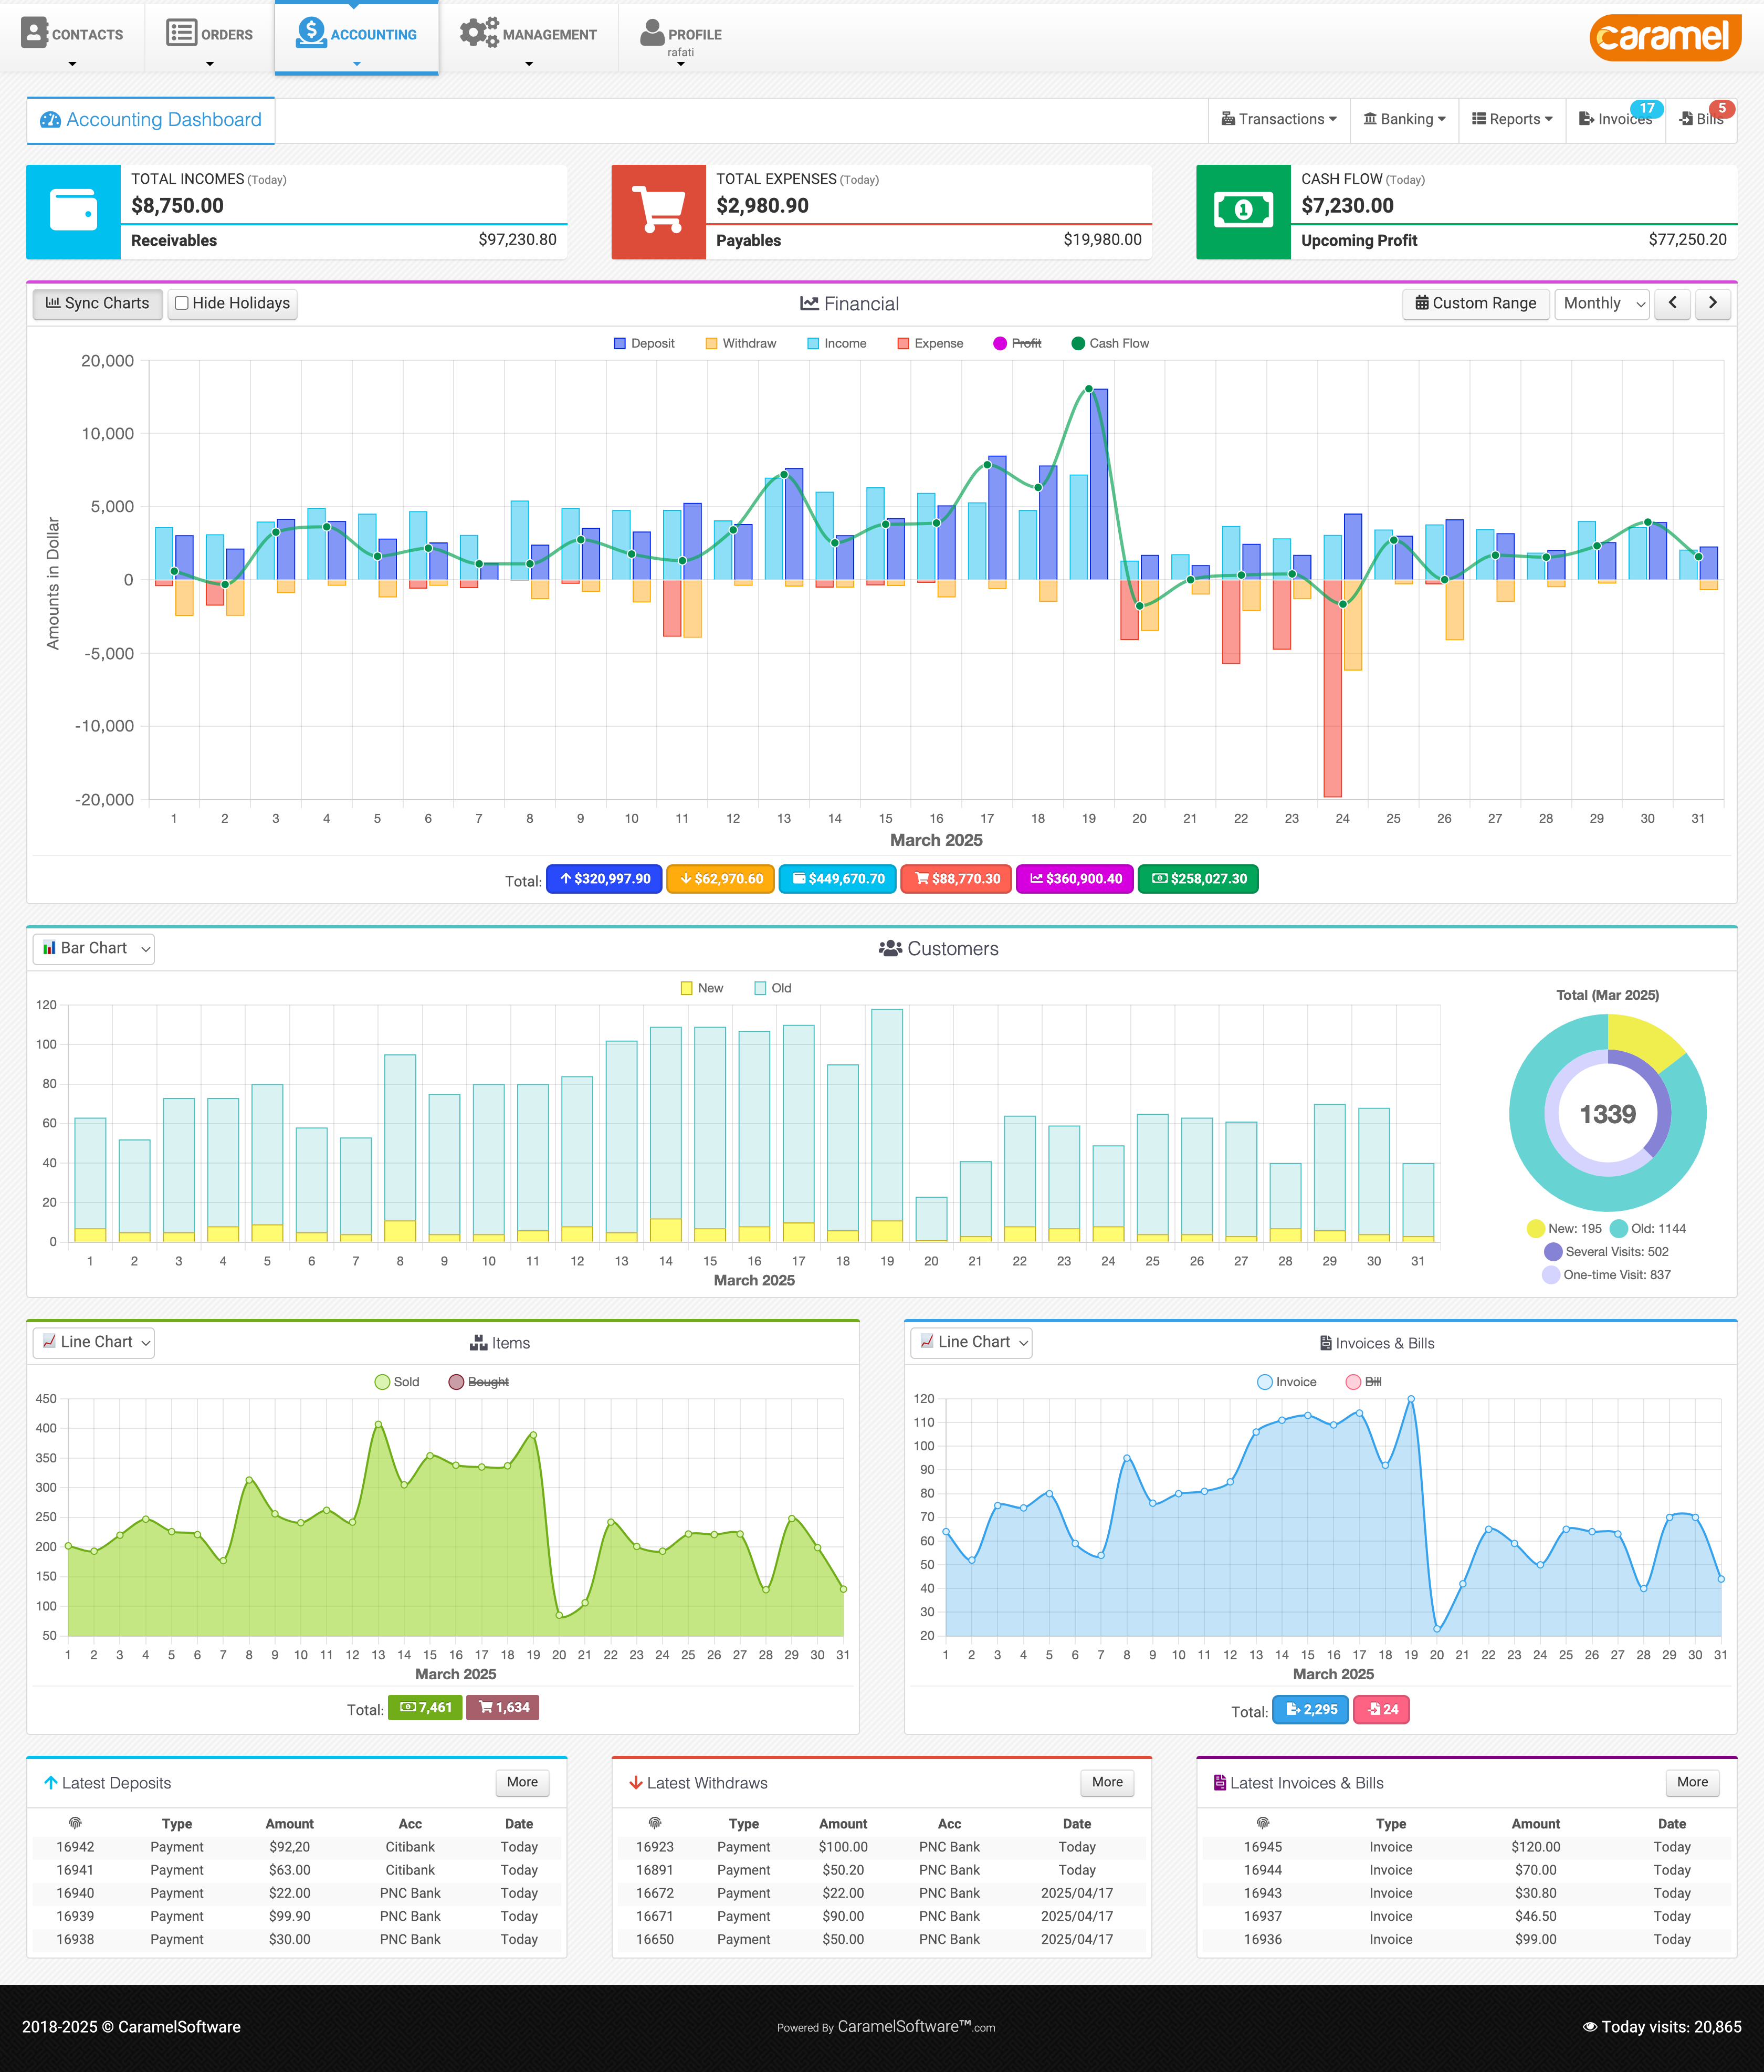
Each chart can be viewed in:
- Hourly (daily)
- Weekly
- Monthly
- Quarterly
- Yearly
- Custom ranges
The footer of each chart shows the total value.
Clicking it redirects you to Transaction Management with matching filters applied.
The main financial chart (the first chart on the dashboard) also supports right-click navigation:
- You can drill down by clicking specific bars or time ranges
- This also redirects to Transaction Management with contextual filters
Important Accounting Concepts
Keep the following points in mind:
- Every order in the Orders module has a textual invoice copy in Accounting
- Any change to an invoice is fully recorded as history
- You can create invoices directly inside Accounting without creating an order
- Invoices represent income
- Bills represent expenses (purchases, utilities, salaries, etc.)
- Vendors are used for Bills, just like Customers are used for Invoices
To record income or expenses:
- Use Invoices and Bills from the Accounting top menu
- Or navigate via Transaction → Vendor → Bill
Learn more:
→ Accounting › Dashboard
→ Accounting › Invoices-Bills