Drop (Create Order)
The Drop page is where you create (or edit) an order by selecting Items, choosing their Options, enabling Operations, and reviewing the Result Summary before confirming.
Think of Drop as: Choose category → choose article → adjust options/operations → review result → confirm.
Page layout (5 columns)
The Drop page is organized into five columns, from left to right:
- Article Categories
- Articles
- Options (based on the selected article)
- Operations (based on the selected article)
- Result Summary
As soon as you select an article (and optionally its options/operations), the final calculated result appears in the last column.
Once the order is confirmed:
- Payment and Print actions become available
- You can assign/print barcodes
- The next stages (Process, Collect, Pick-up) become active
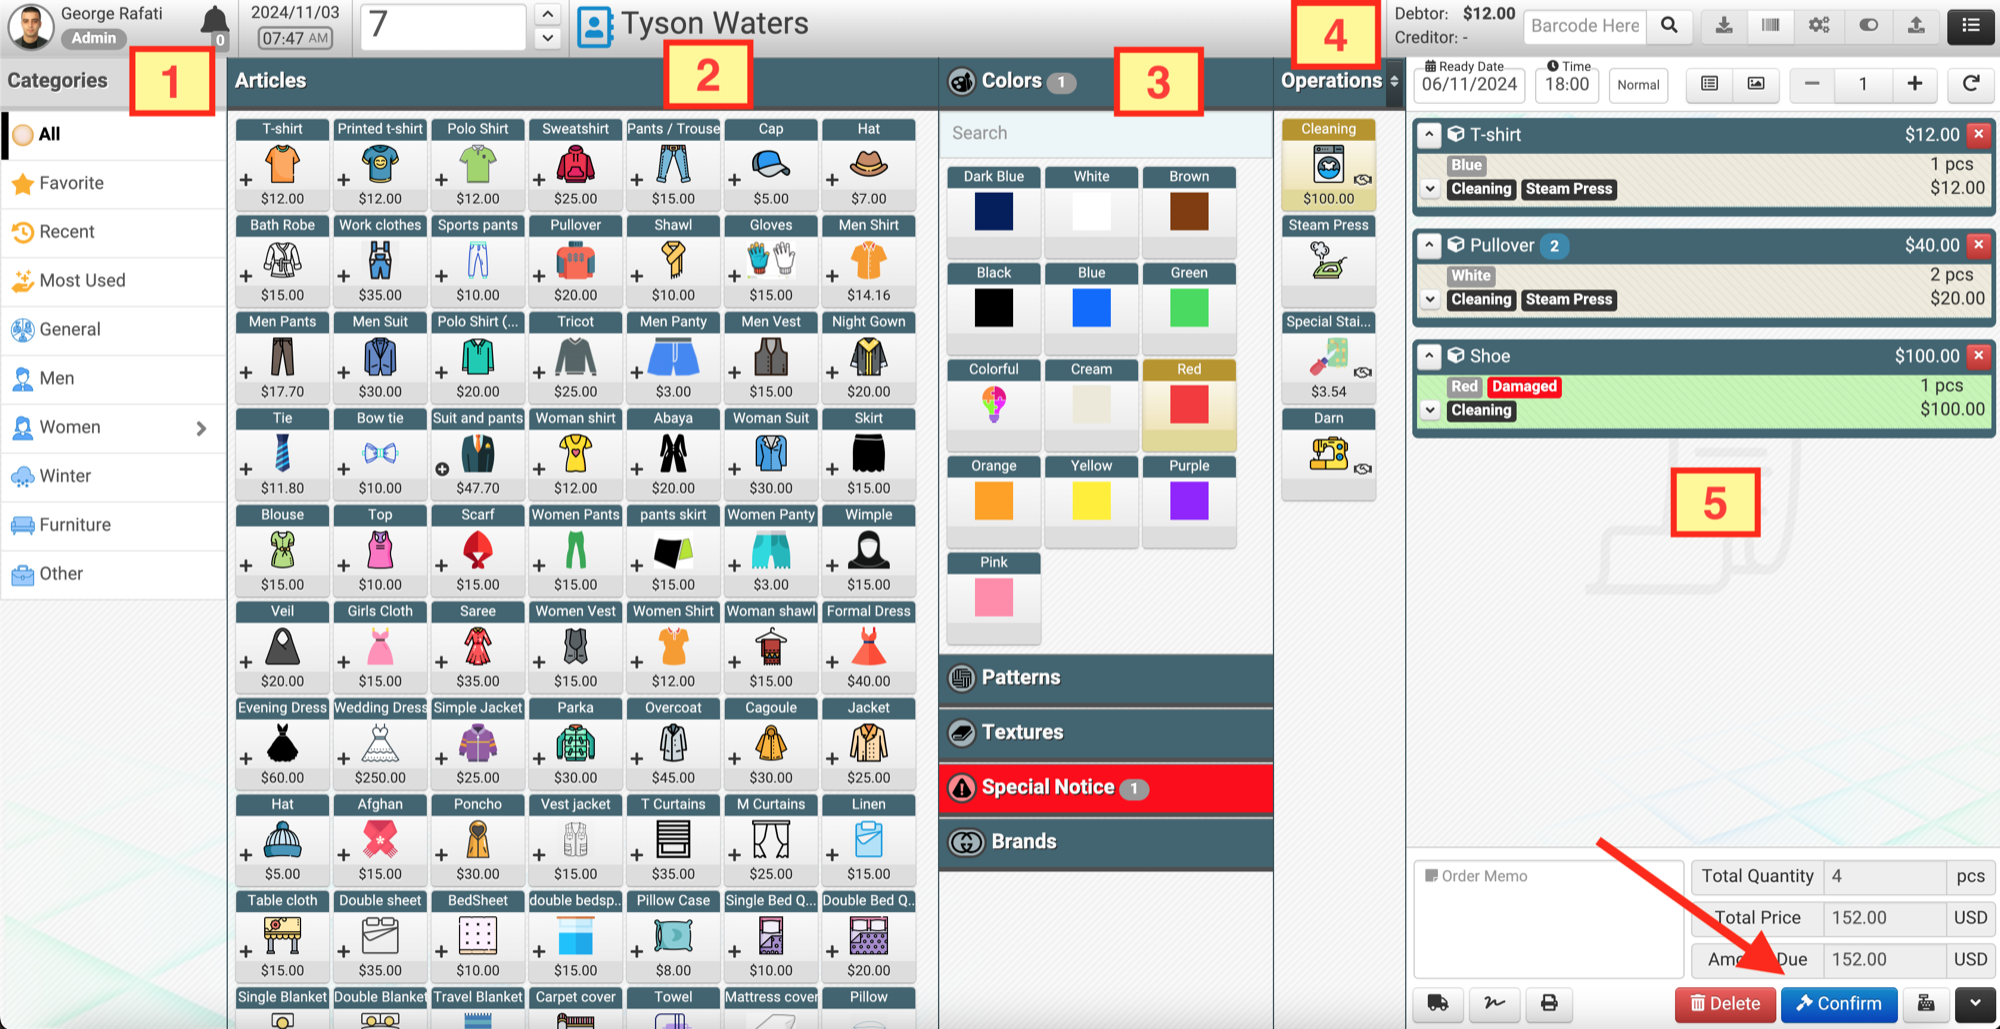
Column 1: Article Categories
At the top of the category list, you always see a few fixed shortcuts:
- All: shows all articles across all categories
- Favorite: shows your favorite articles (configured in Management > Articles)
- Most used: shows articles most frequently selected
- Recent: shows the latest selected articles
Category structure, ordering, and favorites are configured in Management > Articles.
Inline search in headers
In some columns (for example Articles), clicking the column header reveals an inline search input.
This search filters what you see in that column (articles, and in some cases even option values) based on the typed name.
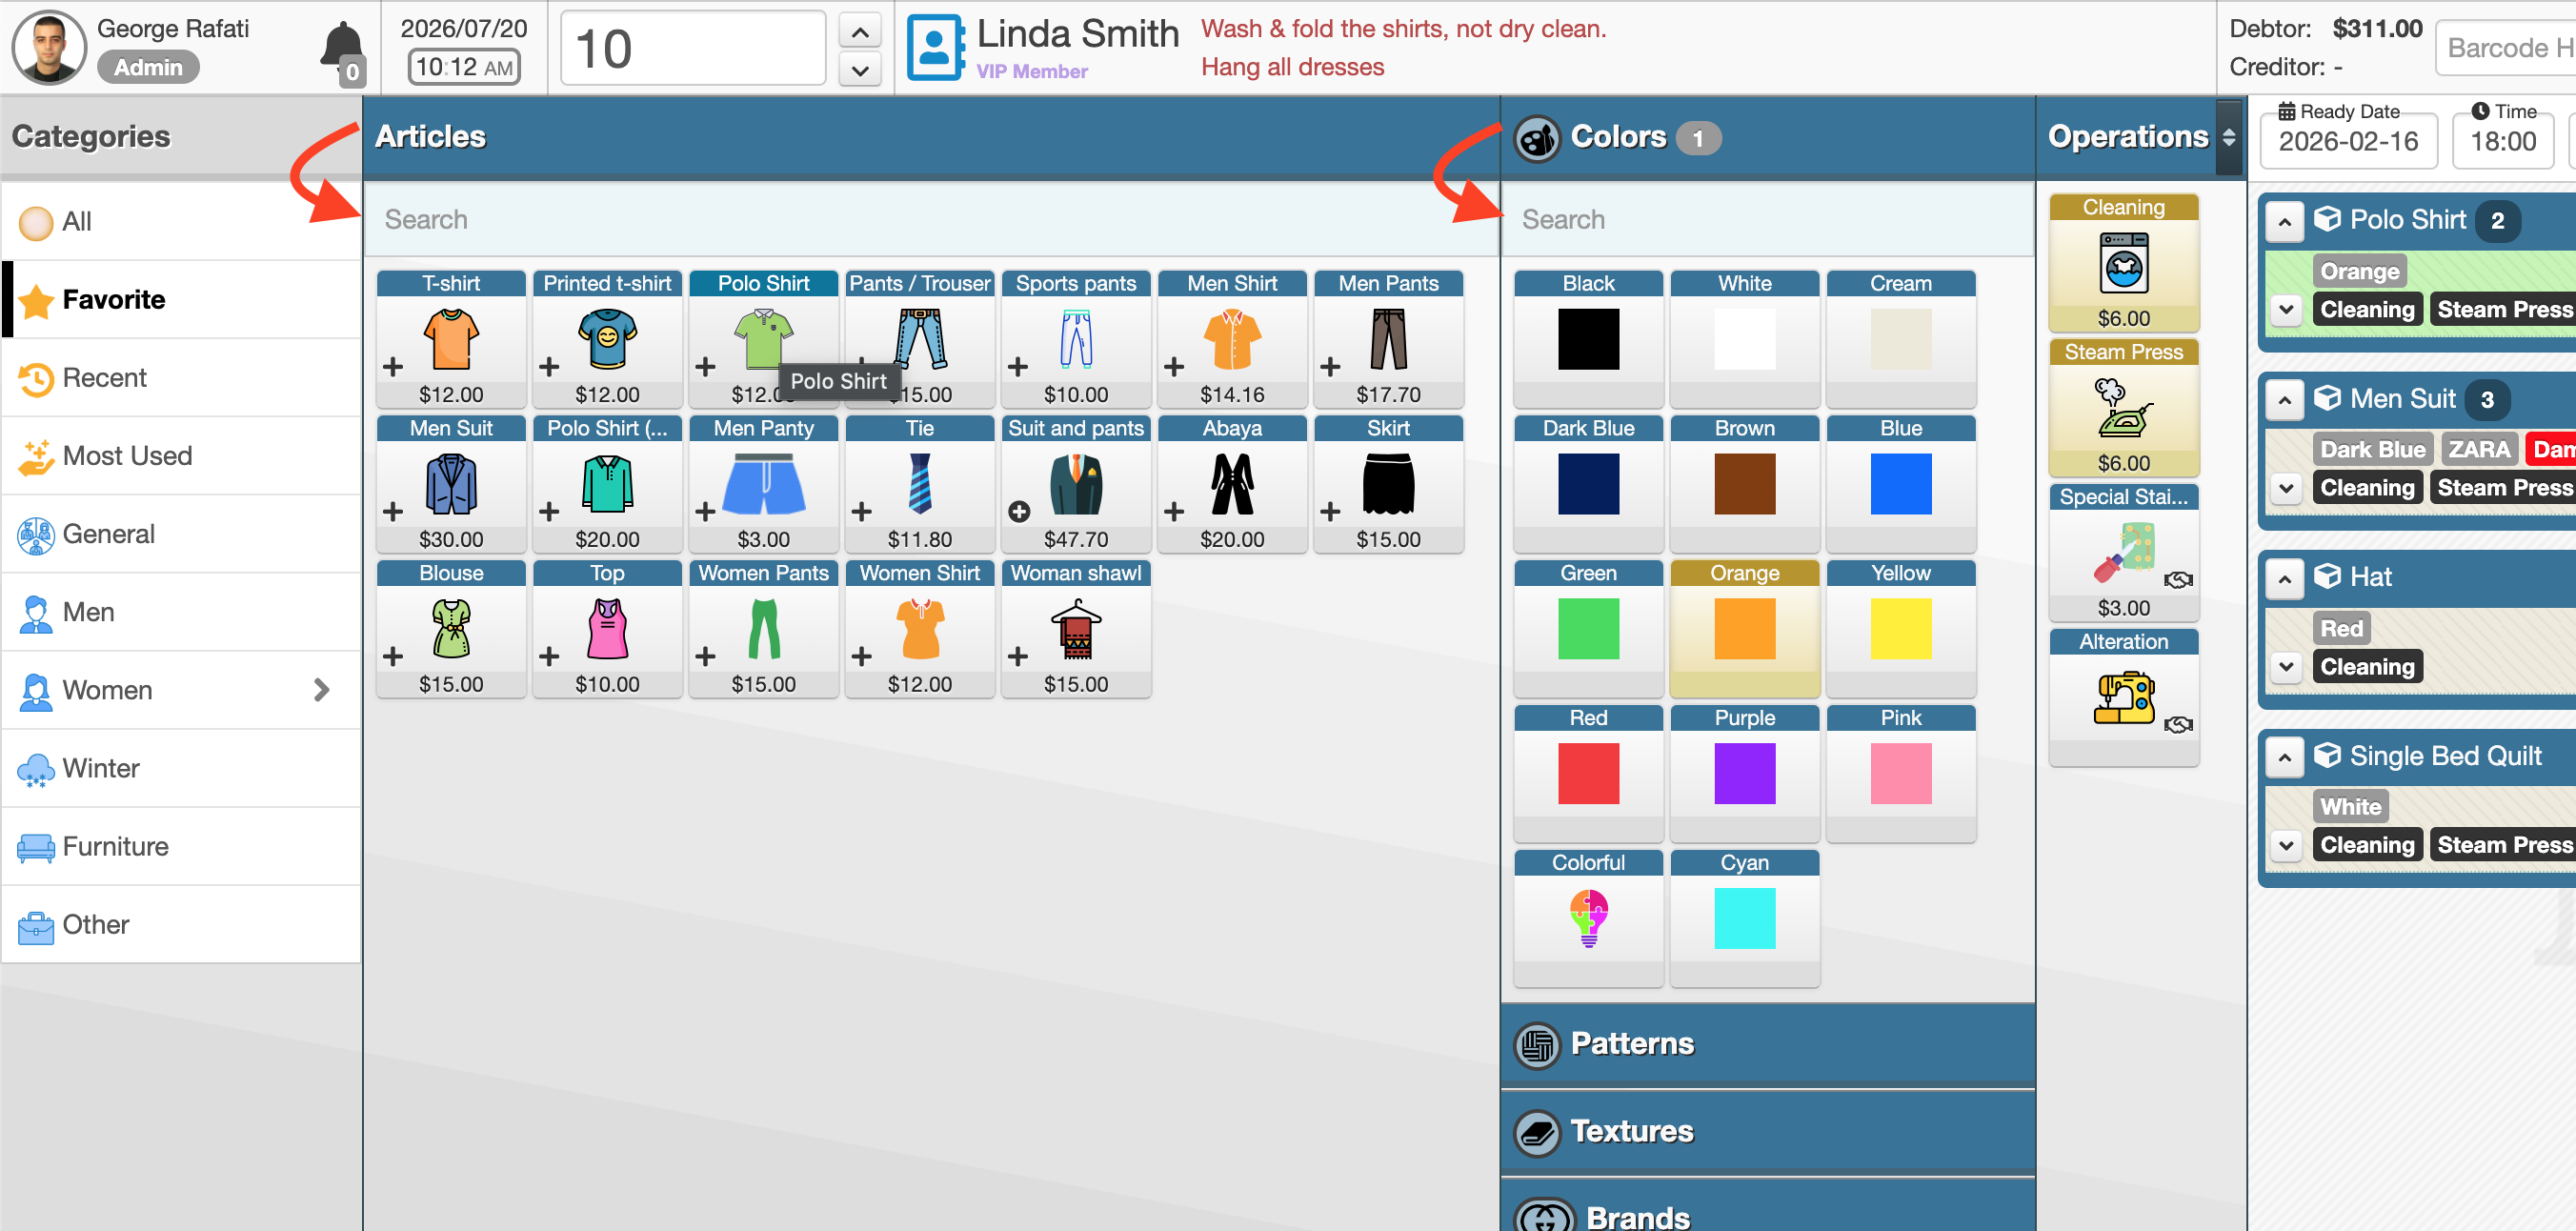
Column 2: Articles
After selecting an Article Category, the related Articles appear here.
Default price on each article tile
Each article tile shows a default price in its footer.
This is the sum of the default/preselected operations for that article.
For permanent pricing rules, use Service Configuration.
Drop also supports fast pricing actions (including quick permanent edits) via right-click — explained later on this page.
What happens when you click an article
When you select an article:
- Options become available in column 3 (in groups)
- Operations become available in column 4
- The item appears immediately in the Result Summary (column 5)
Creating multiple identical items
You have two common ways to create quantity-based items:
Method A — click multiple times first
- Click the article multiple times (creates multiple items quickly)
- Then choose options/operations
Method B — configure first, set quantity later
- Select the article and choose options/operations
- Increase quantity from the quantity control in the Result header (explained below)
If you already selected options and then click the same article again, Drop creates a new row/group for the new item.
Later, you can merge identical items back together.
Column 3: Options (per item)
Options are shown in groups. Some groups are global and always available, and some groups appear only for specific articles.
- Option groups are configured in: Management > Options
- Article-specific option visibility is configured in: Management > Articles > Edit Article
Single vs multiple selection
Options can be configured as:
- Single (choose one)
- Multiple (choose many)
This behavior is set inside Options Management.
Column 4: Operations (services)
This column shows allowed operations for the selected article.
- Clicking an operation tile turns it highlighted (selected)
- Selected operations affect the final price
- Some operations are preselected by default to save time
(click again to deselect and remove its cost)
Reordering operations (drag & drop)
If the current order is not helpful, you can enable sorting:
- Click the small icon
- Drag and drop operation tiles to your preferred order
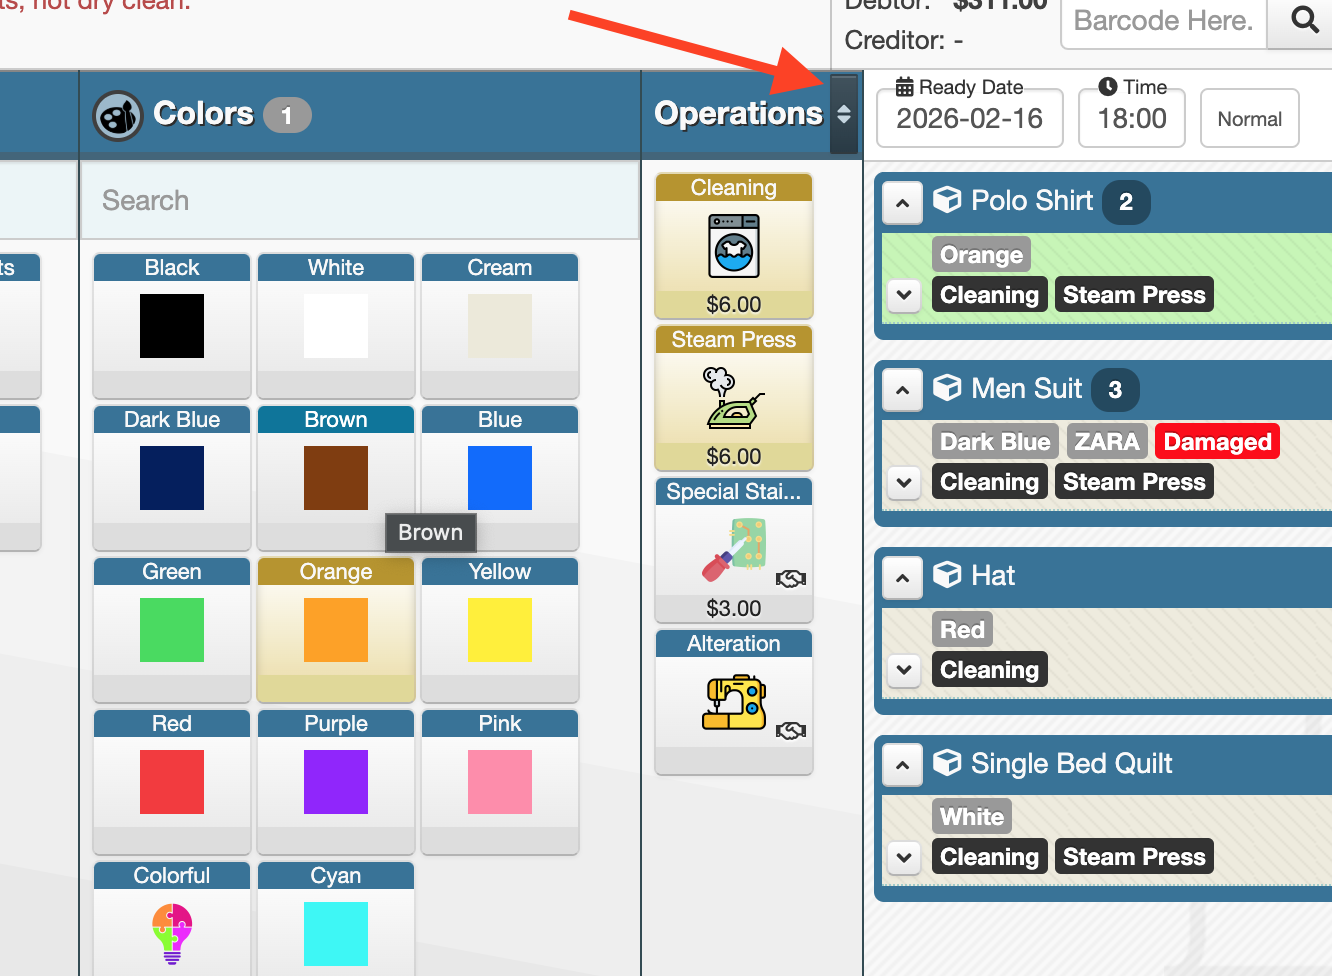
Column 5: Result Summary
The Result Summary column has three areas:
- Header controls
- Main result list
- Footer totals + final action bar
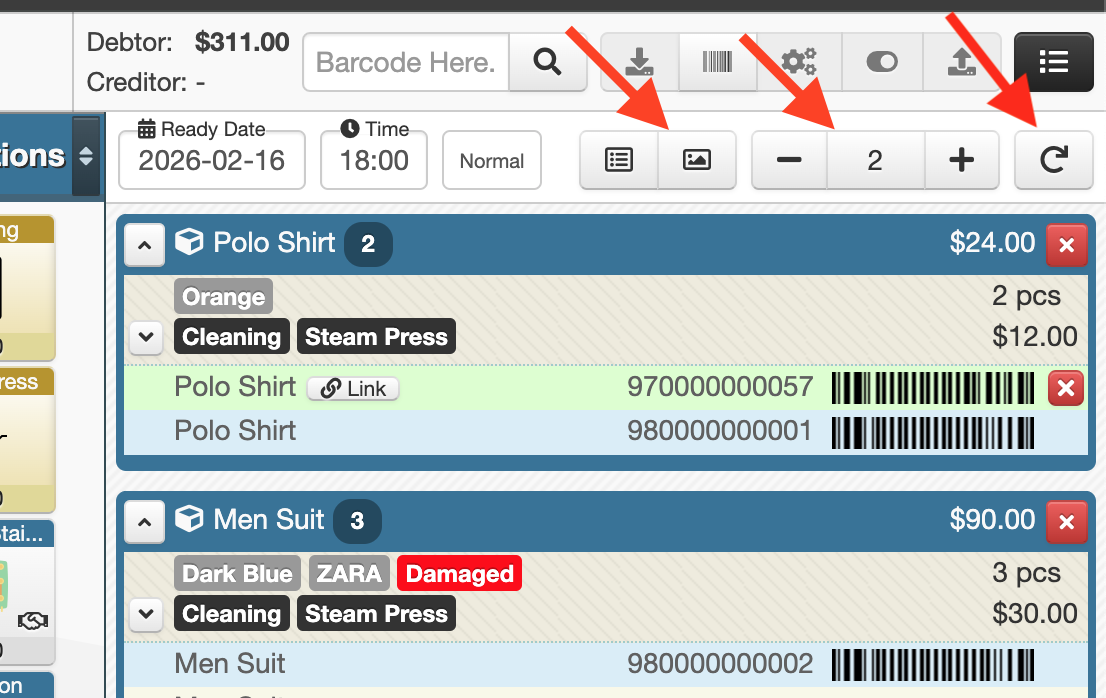
Result header controls (top of column 5)
From left to right:
Ready date & time
Drop suggests the best Ready Date/Time automatically based on:
- order type
- selected operations
- daily capacity
- holidays
- priority rules
- and your setup
You can manually change it by clicking the input to open a modal calendar showing working days and capacities.
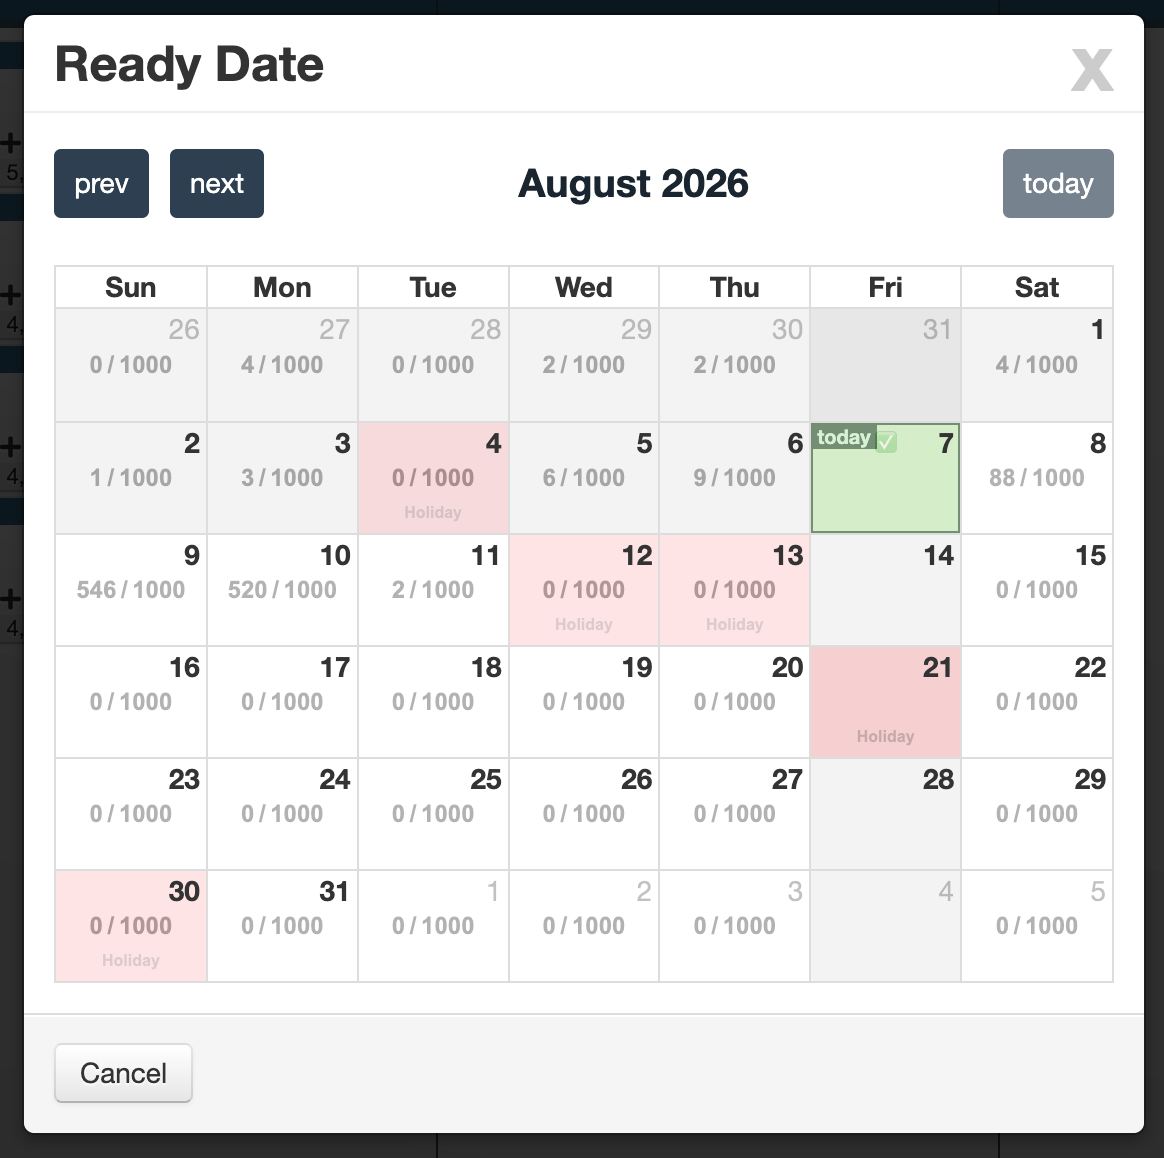
Your working calendar, daily capacities, holidays, and priority logic can be configured during onboarding with the support team.
They can also be managed directly inside the system via: Management > Calendar
Depending on your access level, you may update working days, holidays, and capacity settings from the Calendar module yourself.
Item-level actions (enabled only when an item is selected)
These actions are disabled until you select an item (or a group) from the result list.
- Priority selector (Normal, Urgent, etc.)
- Record Note:
Special notes for internal workflows (e.g., Manager/QC/Staff notes). These notes can be reportable and are configured during setup. - Image Marker:
Capture/upload/mark photos for operational teams (explained later).
Quantity control
Use - / + to adjust quantity, or click the number to type a large value (e.g., 100).
Merge identical items
Use Merge:
This merges all items that are exactly identical (same article + same options + same operations + same pricing).
If there is even one difference, Drop keeps them in separate groups.
Main result list (body)
This is the final list of items you created (or added by barcode scan). Items with identical configuration can appear as one group.
Selecting groups vs single items
- Click a group to select all items in that group
- Click an individual item inside a group to select only that item (highlighted)
Once selected, you can:
- review which options/operations are active
- change previous selections
- adjust priority, notes, image marker, etc.
If you change options/operations for one item inside a group, it splits into its own group automatically.
Use to merge later if they become identical again.
Removing items
- Each group has a remove button: (removes the whole group)
- Selecting a single item enables removing only that item
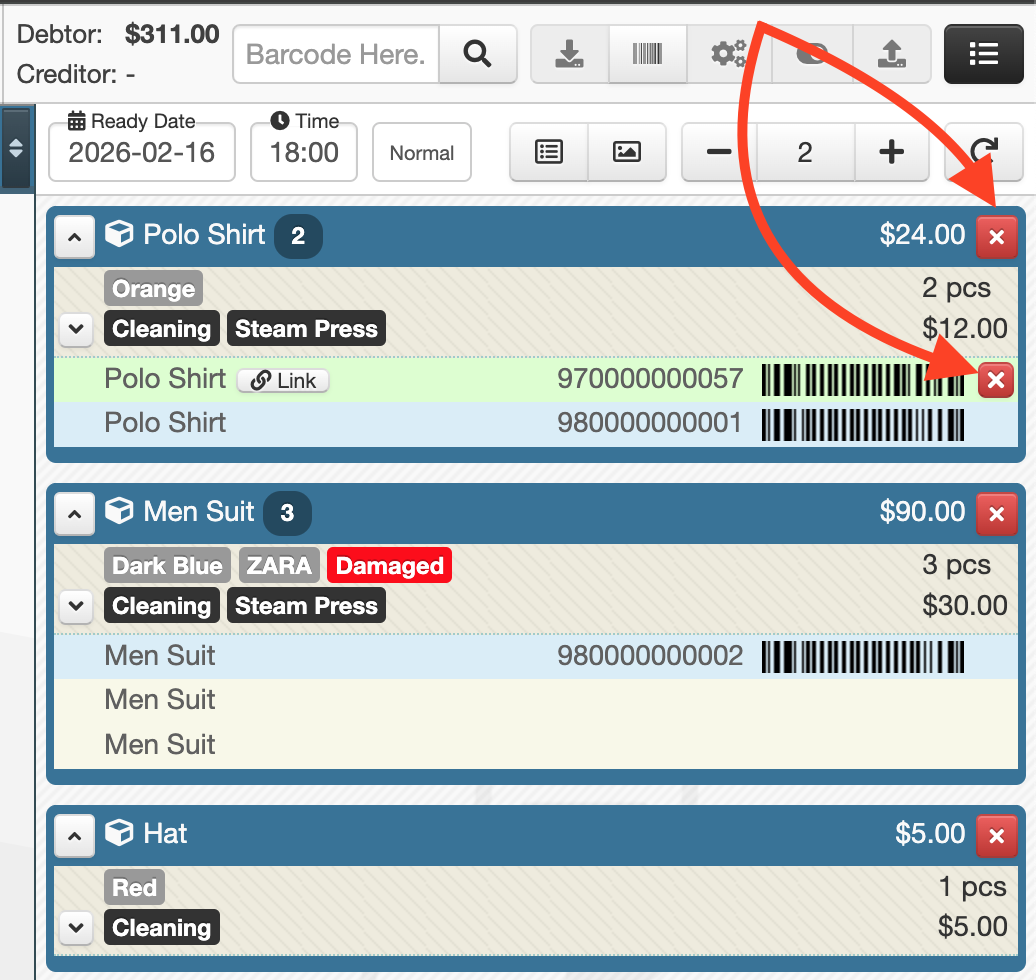
Barcode scan
You can also select items using barcode scanning (behavior depends on your barcode workflow setup).
Fast barcode assignment (pre-printed labels)
If you already have pre-printed barcodes (labels without an assigned identity), you can assign them quickly in Drop without going to the separate barcode assignment page.
How it works:
- Select an item in the Result list
- Scan the pre-printed barcode label
- Caramel assigns that barcode to the selected item immediately
Faster flow for grouped items (identical items)
When a group contains multiple identical items, you can assign barcodes even faster:
- Start scanning barcodes one by one (without manually selecting the next item)
- After each scan, Caramel automatically selects the next item in the same group
- You simply continue scanning the next barcode, then the next, and so on
Use this method when you have a stack of printed labels ready and you want to label multiple identical items quickly with minimal clicks.
Result footer totals (bottom area)
You typically see:
- Quantity (pcs / items)
- Total price
- Amount due
- Order memo (notes for this order)
Order memo is usually for internal usage. If you want it to appear on invoices/app, confirm your configuration with your setup rules.
Final action bar (Confirm / Modify / Paid / utilities)
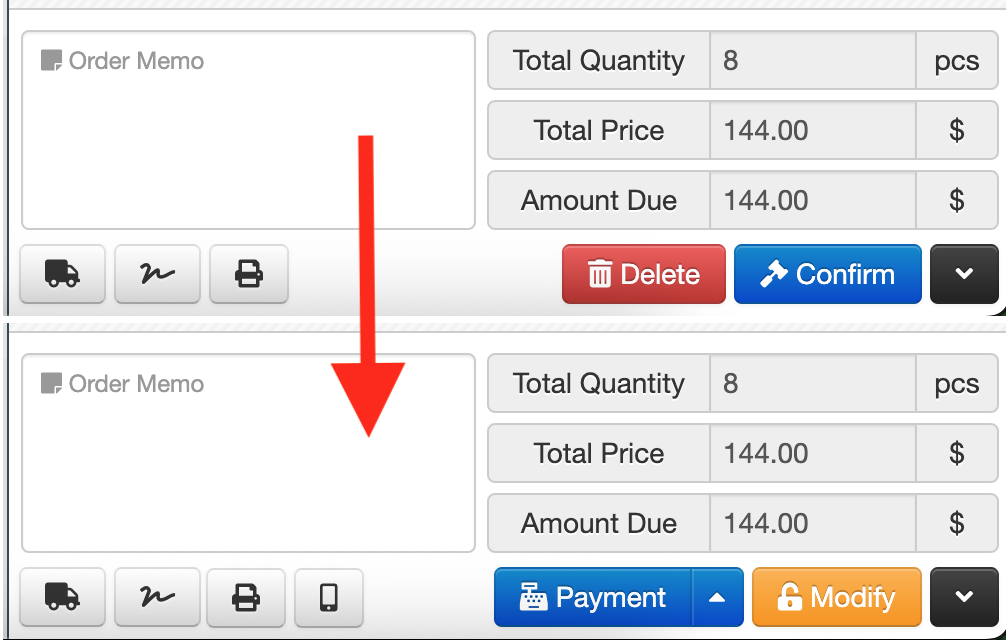
Pending vs Confirmed states
Before confirmation (Pending), you usually see: Confirm Delete
After confirmation:
- Confirm changes to actions like Modify and Payment (depending on permissions)
If you click Modify, Caramel may show a warning. If you have access and confirm, the order returns to Pending state and becomes editable again.
Utility buttons you may see
- Delivery / Pickup:
- Customer signature:
- Print:
- SMS:
- Collapse header rows: (black)
Hides the summary rows to make more room for the item list; click again to restore.
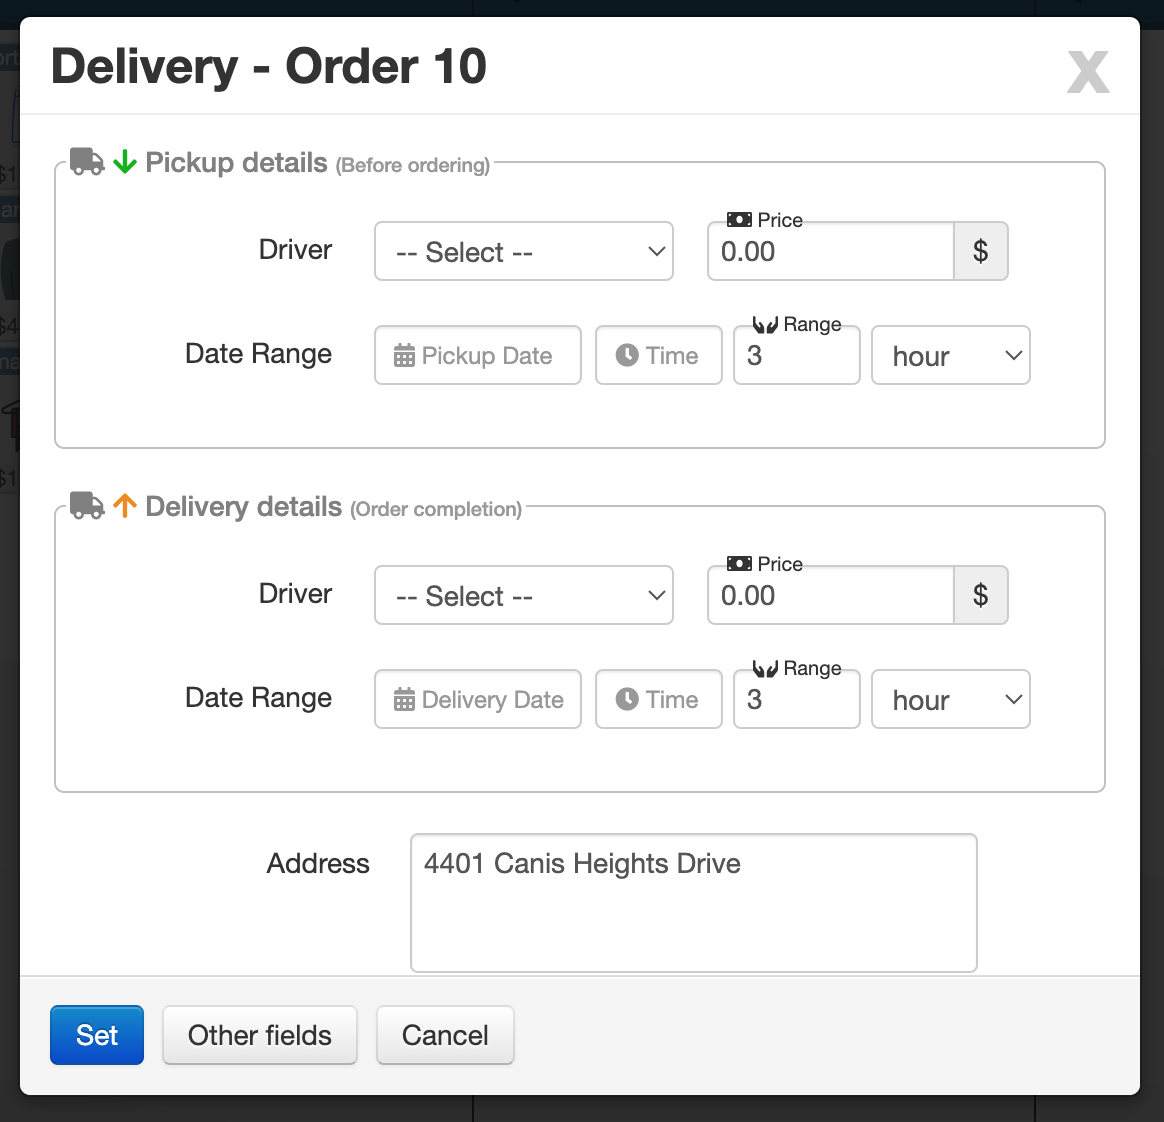
Delivery / Pickup modal
This opens a modal to capture (or view) logistics information:
- Pickup details (before ordering): date/time range (e.g., a 3-hour window), address, price
- Delivery details (order completion): similar fields for delivery
Defaults can be pulled from the customer’s primary address, but may be editable by the customer in CRM/app (depending on setup).
Delivery/Pickup details are also useful for future reporting (routes, costs, performance, etc.).
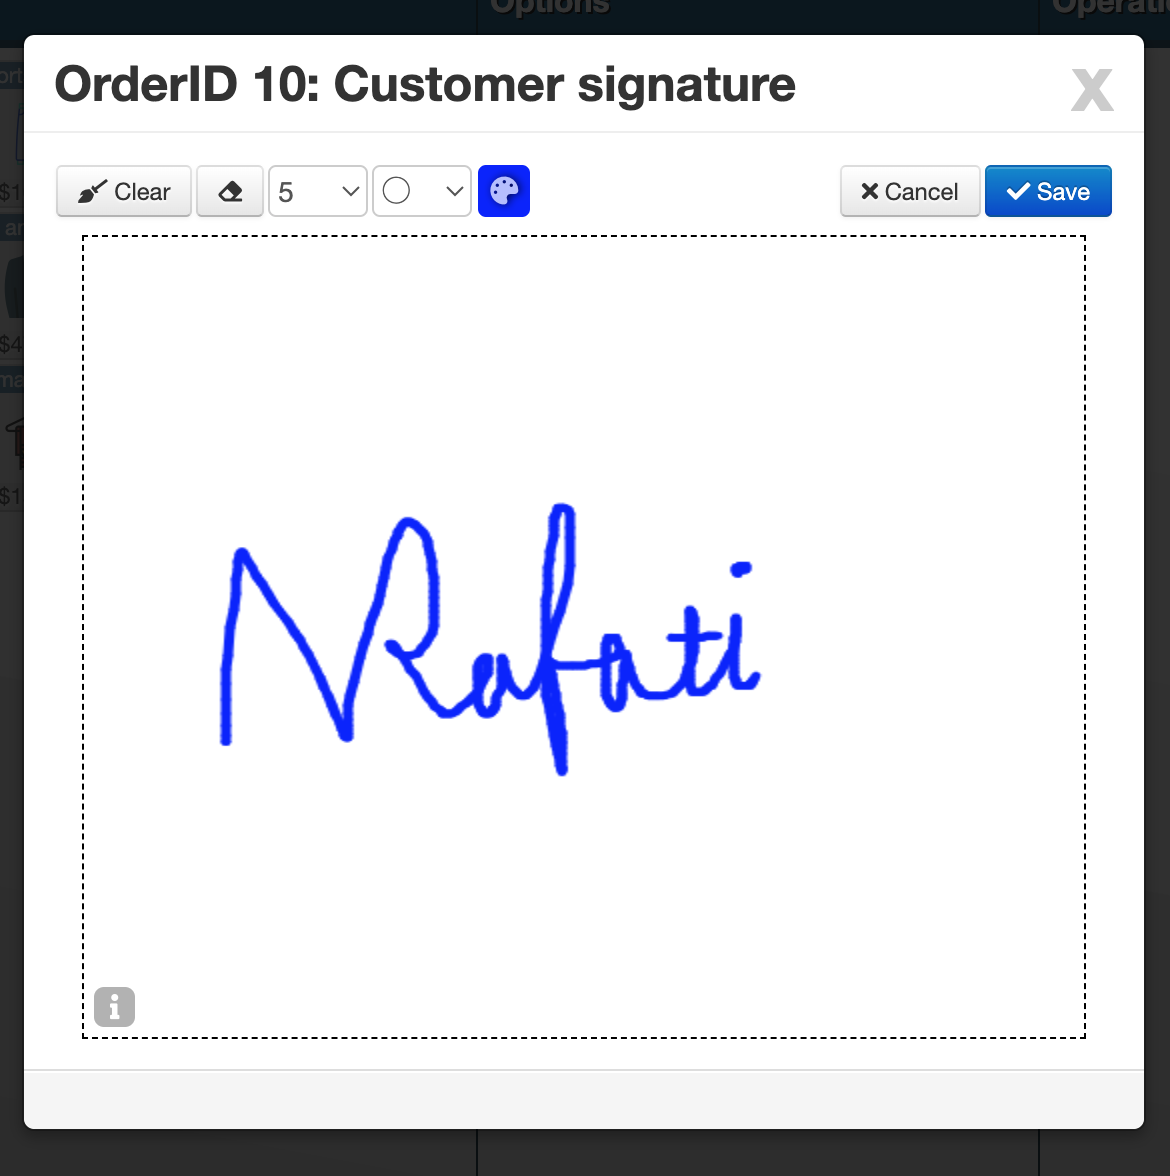
Customer signature
Opens a signature modal where you can capture signature using:
- mouse
- touch screen
- stylus
Pen size/color can be adjusted.
Printing
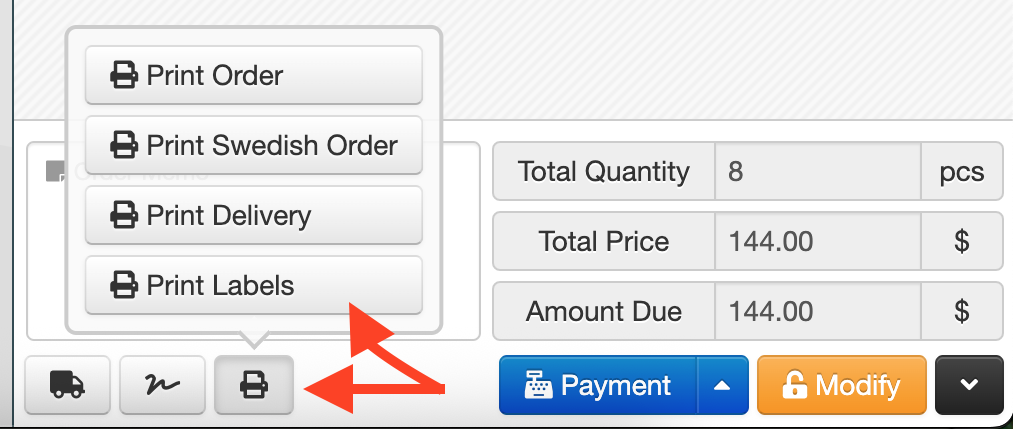
Shows the print templates configured for your business during setup.
Selecting a template sends the job directly to the printer (usually without extra dialogs).
Examples of what can be configured:
- print formats before confirmation vs after confirmation
- driver pickup receipt including customer address/phone
Flexible print types (setup-based)
Printing is not limited to order receipts. During setup, different print types can be implemented based on your workflow.
For example, in addition to order printouts, Caramel can also print washable labels (laundry-safe labels) directly from this menu, depending on the templates configured during onboarding.
Available print types and label formats depend on what is configured for your business during setup.
SMS
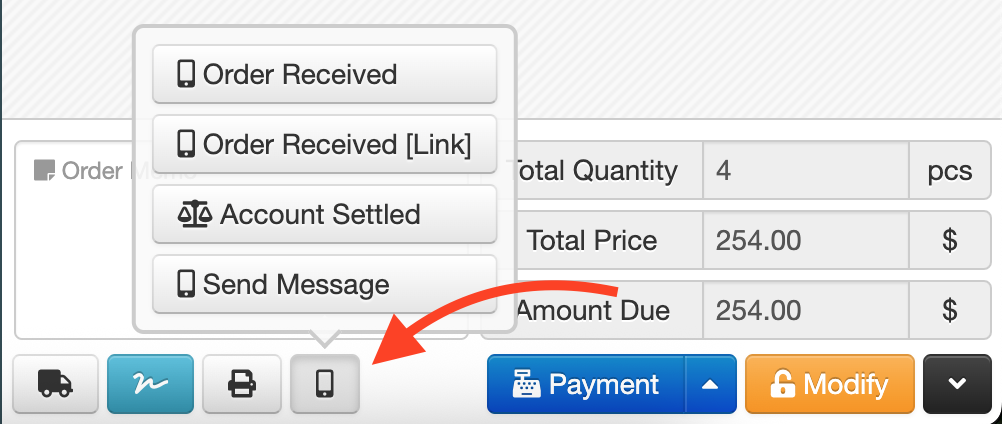
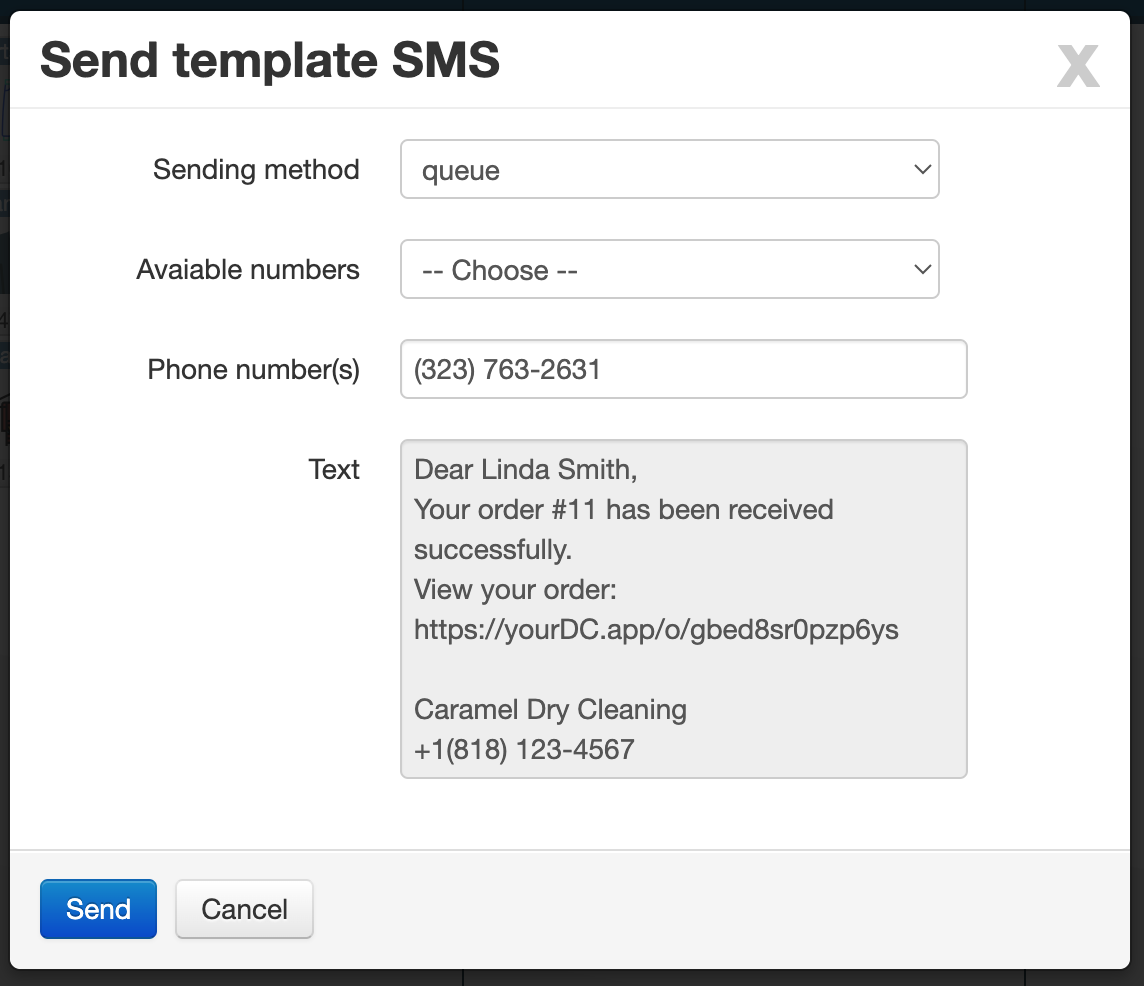
The SMS (Whatsapp) form can appear automatically after confirmation or manually via the SMS button.
Typical fields:
- Sending method: Queue / Instant
- Available numbers: customer phone numbers
- Text: message template (may be prefilled based on order type)
Queue vs Instant:
- Queue: messages wait and can still be edited during the queue window
- Instant: sends immediately and can’t be edited afterward
Payments (after confirmation) + menu
After confirming, a Payment button becomes available.
- Clicking it opens the customer payment flow (Accounting module)
- If payment is completed, the main button may become disabled
The small menu button (caret) stays available and can include options such as:
- Add More Payment
- Add Discount
- Add Credit (No Payment)
- Refund / Recompense
- Credits / Payment History
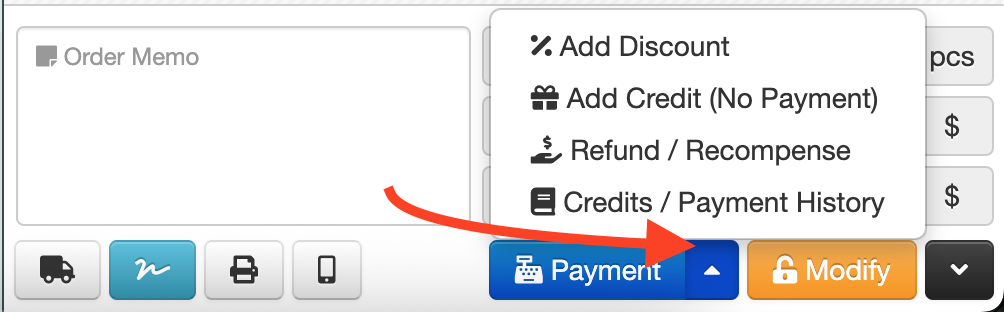
Image Marker (photos & marking)
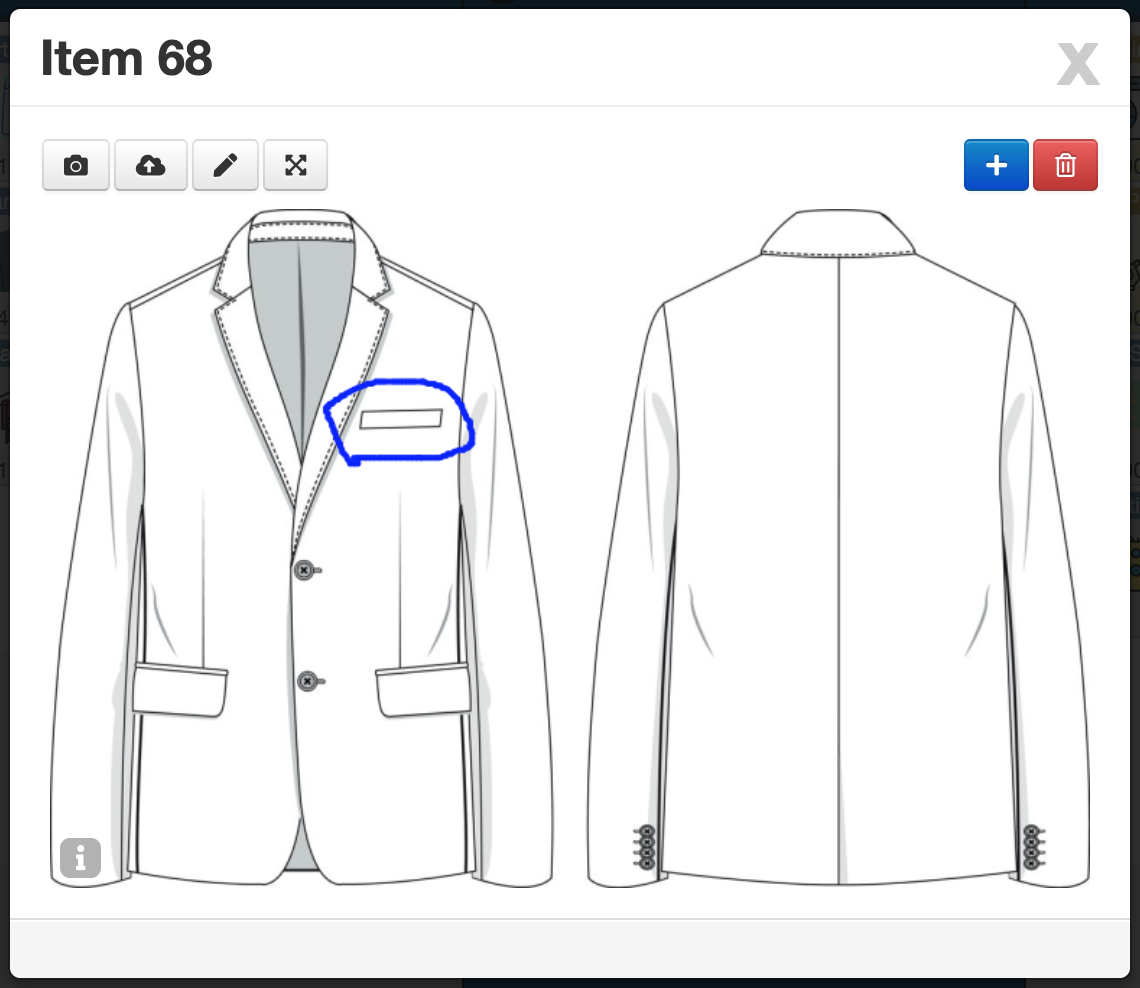
When you select an item in the result list, the Image Marker button becomes active.
If a group contains multiple items, Caramel may ask which item you want to open in the Image Marker.
What opens
A slide-based window (Image Marker module) appears:
- Each item can have multiple slides
- The system may show a default pattern image depending on the article (e.g., a shoe outline)
Top tools (left to right)
Common single-icon tools:
- Capture photo
- Upload from device
- Drawing mode
- Zoom
Then:
- pagination controls for switching slides
(keyboard left/right arrows usually work for faster navigation) - slide actions:
- reset (orange)
- - remove slide (red)
- + add new slide
By default, each camera capture creates a new slide.
Fast marking with pins
- Click on the image to add a marker pin
Pins appear as with a counter number - Pins can be dragged and repositioned
- Pins and drawings are used later by operational staff in Process/Workflow (and can help QC)
Drawing mode
Click to enter drawing:
- choose pen size / color
- erase parts or clear everything
Changing operation prices (temporary vs permanent)
Caramel supports two pricing scenarios:
- Temporary change: affects only the selected item within the current order
- Permanent change: saves pricing rules for that article/operation for future orders
These actions are typically done via right-click (or long press).
Temporary price change (for current order item)
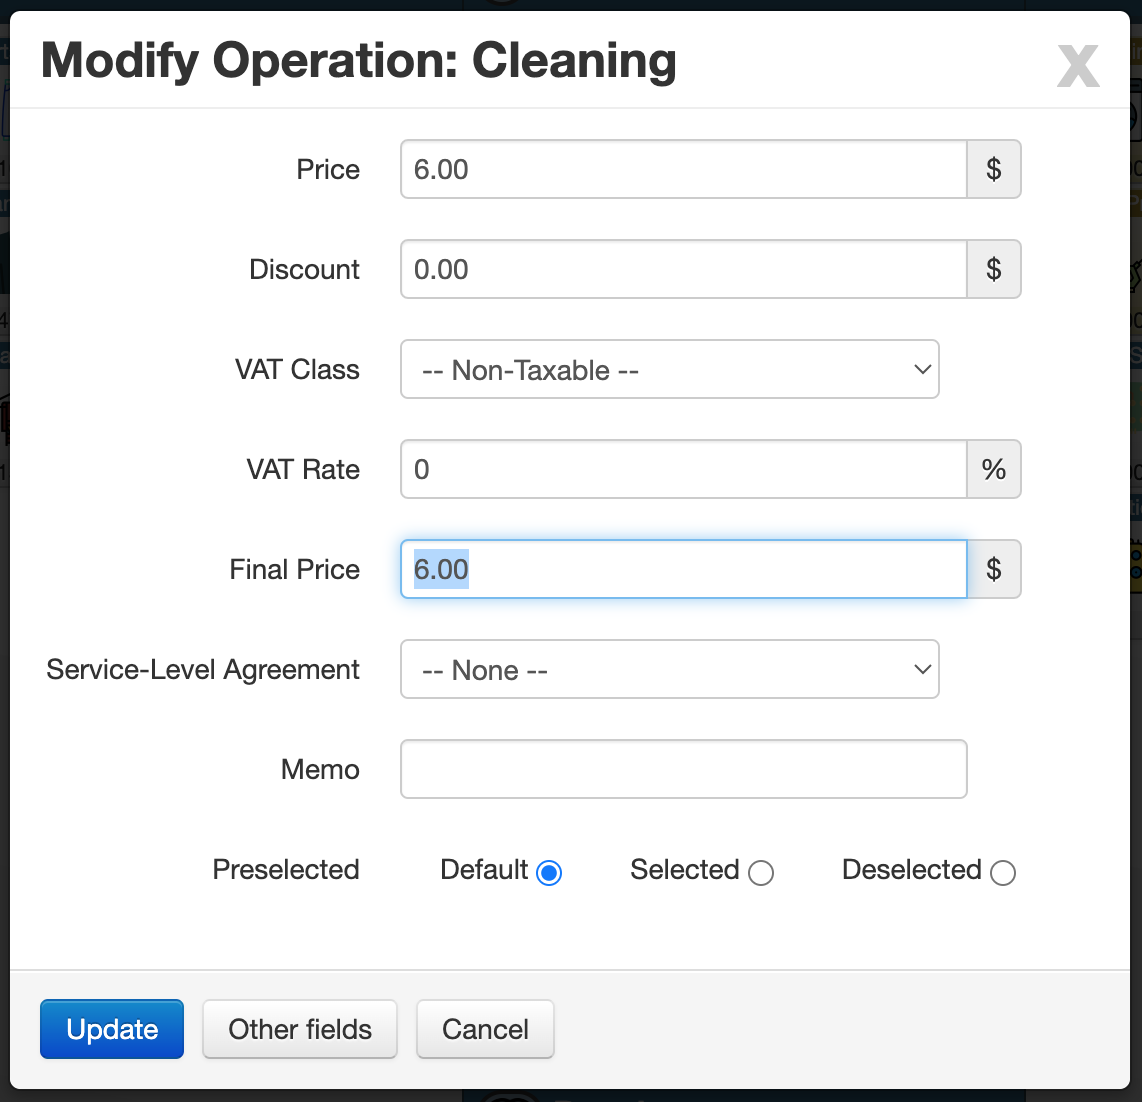
Right-click an operation in Operations column to open a pricing editor for the selected item.
Common fields you may see:
- Price, Discount, VAT Class, VAT Rate
- Final Price
- Service-Level Agreement
- Memo
- Preselected (Default / Selected / Deselected)
Most teams edit Final Price. Other fields auto-adjust based on discount/VAT logic.
Service-Level Agreement is typically a dropdown configured during setup to describe service level expectations, and may appear on prints/app (based on your configuration).
Preselected controls whether the operation should be default-selected for items or remain manual.
Permanent price change (quick access)
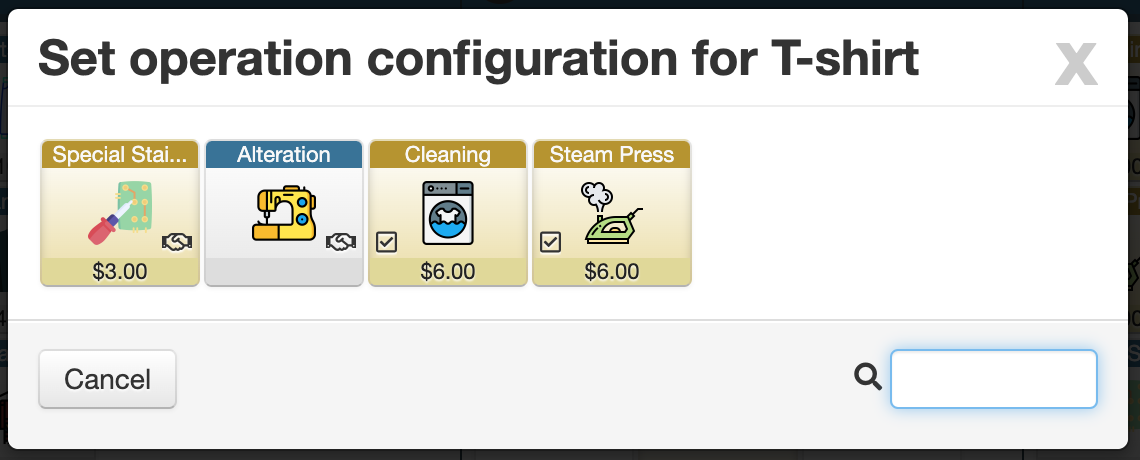
Right-click an article to see a list of its allowed operations.
Selecting an operation opens a faster “permanent pricing” form (a shortcut of Service Configuration).
Fields may include:
- Price, Discount Cap, Cost, Duration
- Service-Level Agreement
- VAT Class
- Drop Access (Assignable / Not assignable)
- Preselected (Yes / No)
- Variable (Yes / No)
Notes:
- Cost is useful for future cost/profit reporting
- Discount Cap limits maximum discount (can be 0)
- Drop Access controls whether this operation can be used in Drop
- Variable means the operation price often changes — Caramel can prompt the temporary price editor immediately for speed
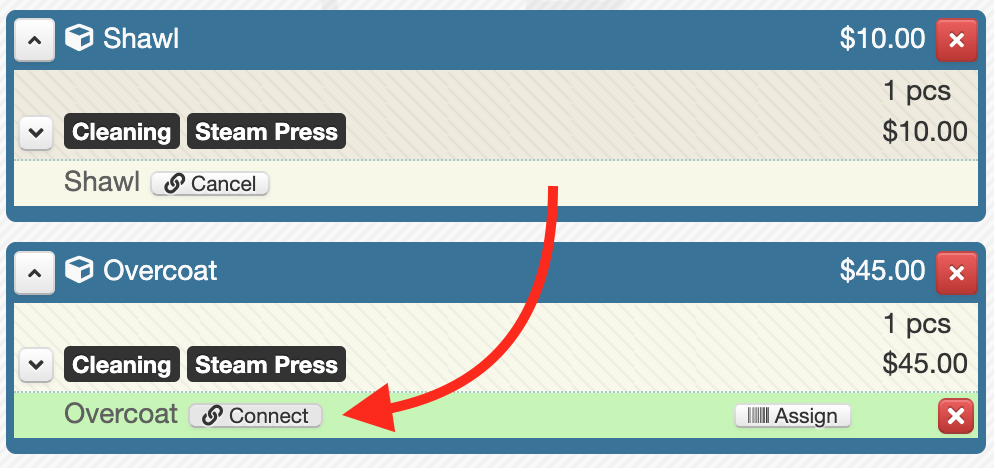
Linking items /
Some items logically belong together (e.g., a jacket and its belt). Linking helps operational teams and QC understand dependencies.
How to link
- Select the dependent item in the result list
- Click Link (button starts blinking)
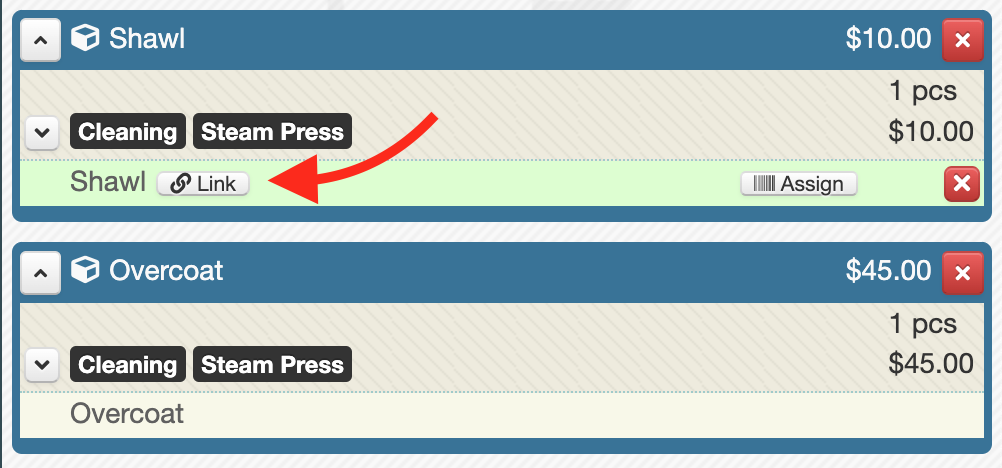
- Select the main item to connect to
- Click Connect and confirm
How to unlink
- Select the linked item
- Click Unlink
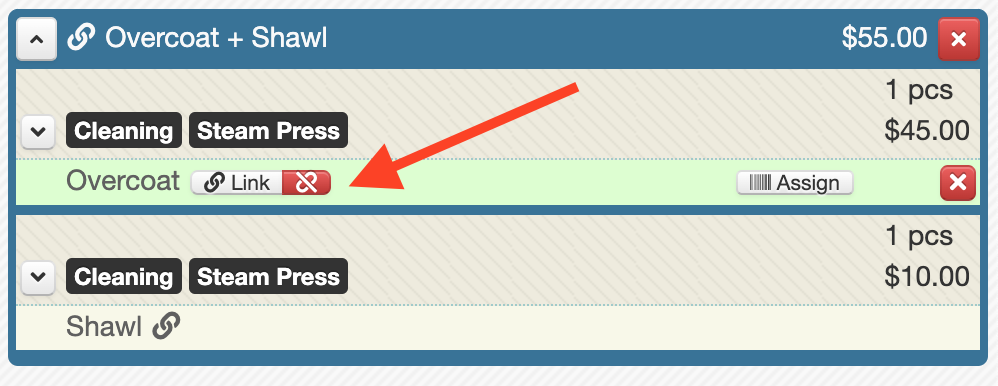
Some articles may be defined as pre-linked bundles (e.g., a suit that includes jacket + pants).
These bundles are configured in Management > Articles and can affect pricing behavior.
Notes and memos (quick reference)
Caramel can store notes at different levels. Here’s what each one is for:
Customer fixed memo (global)
Configured in Contacts (Customer form).
Often shown near the customer name in the top menu.
- To edit quickly, click: near the customer name (if available)
- Usually meant to be internal-only (hidden from customer)
Operation memo
Added by right-clicking an operation (or via its editor).
Visual indicators:
- operation tile may show
- in grouped result lists it may appear with an icon next to operation name
- hover can reveal memo text
This memo is often appropriate to show on printed invoices/app (depends on your setup).
Record Note
Special internal notes (manager/QC/staff).
Typically configured during setup and may be reportable.
Photo notes & markings
- Pin notes: placed on image slides (usually internal)
- Drawings: good for visually explaining issues (can be customer-facing in some workflows)
Order memo
A memo for this specific order (commonly internal).
If you want a memo to appear for the customer (invoice/app), standardize which memo type you use and confirm its visibility rules during setup.