Assignation
The Assignation page is where you give identity to Items by printing system barcodes or assigning pre-printed labels (barcode or RFID) inside Caramel.
It is commonly used at intake or before production, but in some workflows you can skip it because basic printing/assigning is also available in the Drop flow.
If you only need a quick “print everything” action, you may do it in Drop.
Use Assignation when you need selective printing, selective assigning, or to free/remove assigned labels.
Barcode types in Caramel
Caramel supports two label types in day-to-day operations:
-
97xxxx… (System-printed / larger labels)
Printed after selecting one or more Items. These labels can include extra context (like customer/order details) depending on your setup. -
98xxxx… (Pre-printed / smaller blank labels)
Printed in advance (e.g., a batch of 20,000). They are “blank identities” until you assign them to an Item.
Each approach has pros/cons (speed, cost, operational flexibility). Your team may follow the strategy defined in your internal SOP.
When this page is the right choice
Use Assignation when you need to:
- Print 97 labels for selected Items only
- Assign 98 pre-printed labels to specific Items
- Confirm you reached 100% labeled status for an order
- Transfer selected Items to another order/customer
- Print labels only for the rows you selected (not “print all”)
In some configurations, label printing/assignment can also be done during Drop. However, Assignation is designed for more controlled actions (per-row selection, managing already-assigned labels, and focused progress tracking).
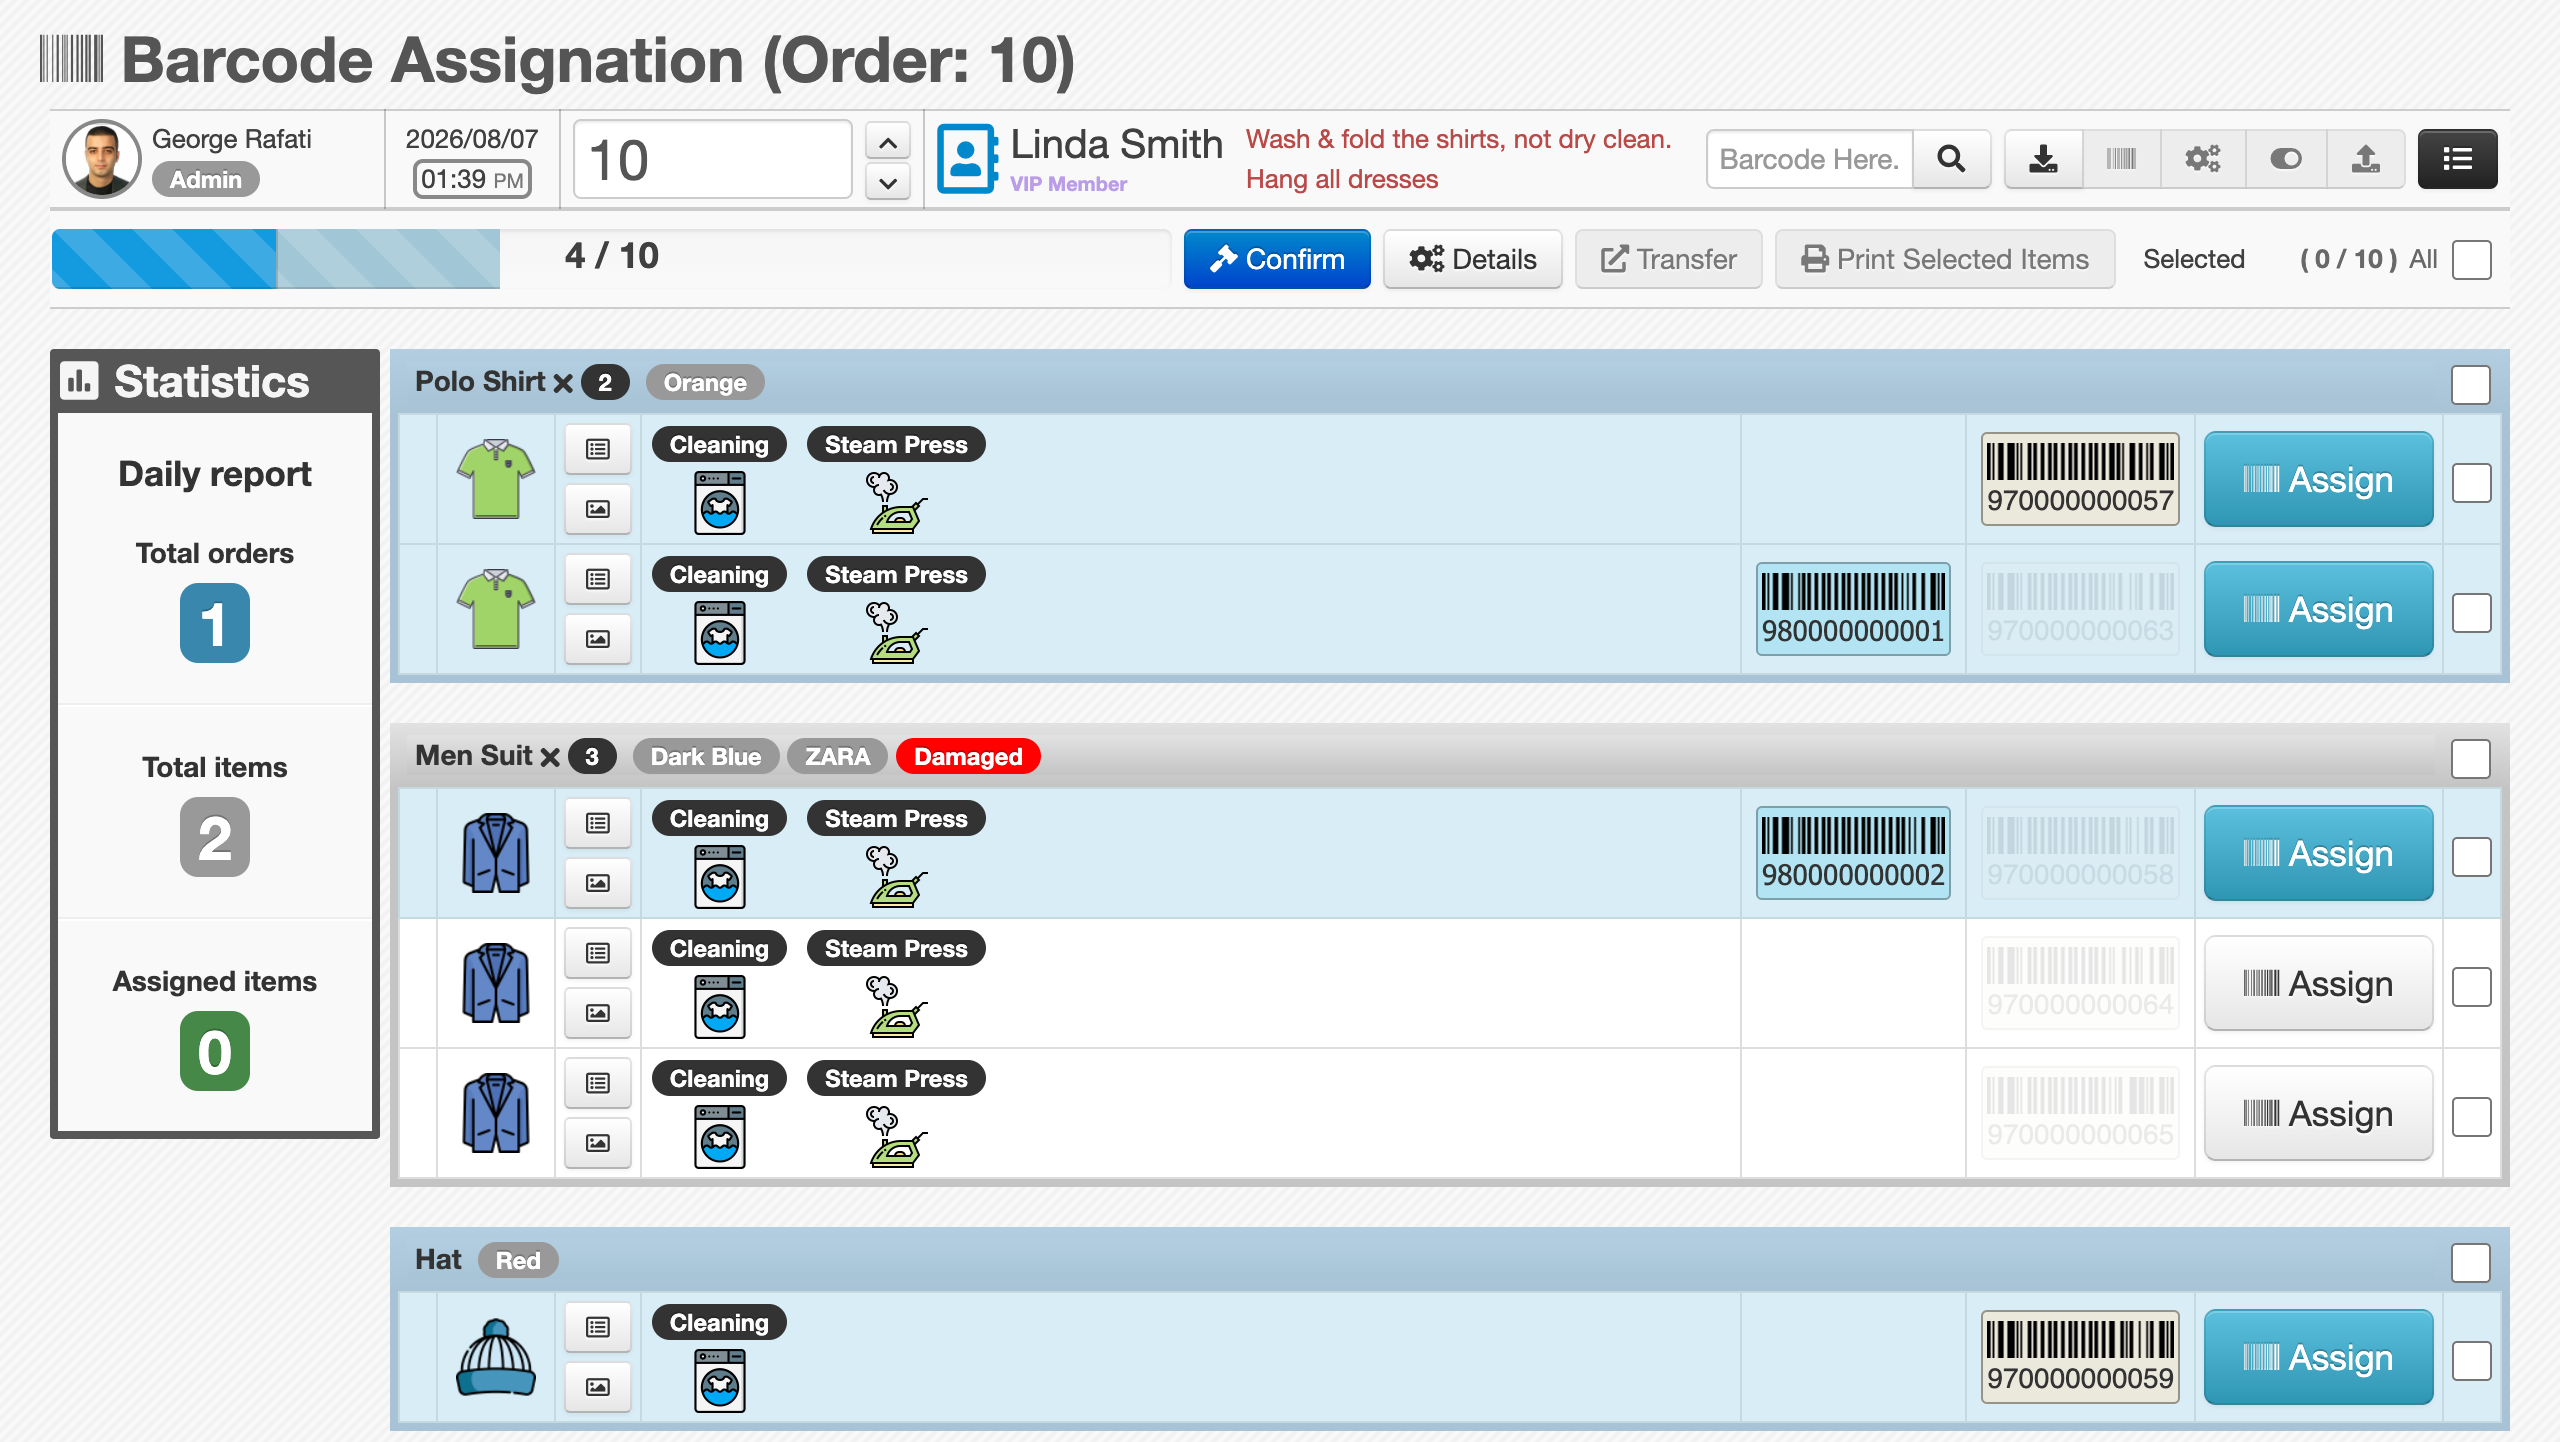
Top menu (second row) and progress
This page uses a second top menu row above the Items table (the main/top navigation is explained in the general UI overview).
In this second row you typically see:
- Progress bar for labeling completion
- Light fill: Items with printed labels (97)
- Dark fill: Items with assigned labels (98)
- Confirm (only if the order is not confirmed yet)
- Details for a quick, one-glance summary of the order
- Transfer to move selected Items to another order (or transfer ownership between customers)
- Print Selected Items for printing labels for only the selected rows
The Transfer and Print Selected Items actions become active after selecting at least one Item row.
When all Items have labels, a blue check indicator may appear in this row to show Assignation is complete.
Understanding the Items table
Assignation is intentionally simple: a list of Item rows grouped by article/type.
Group header
Each group header shows:
- Article name
- Count of Items in that group
- Options/attributes (for example: color, pattern, special notes, etc.)
Item row layout
Each Item row usually contains:
- Article icon (left)
- The action/status for that row
- The label(s) attached to that Item shown as rectangular chips
- An Assign button (for 98 labels)
- A checkbox for row selection
Selecting a row also selects its checkbox.
Print 97 labels (Print Selected Items)
To print system labels (97):
- Select one or more Item rows.
- Click Print Selected Items in the second top menu row.
Printed labels are then shown on the same row as label chips.
Use row selection when you want to print labels for only a subset of Items (for example, only the Items you physically received).
Assign 98 pre-printed labels
You can assign a pre-printed blank label (98) in two ways. Both end with the same result: the label appears as a chip on the Item row.
Method A: Scan first, then Assign
- Scan the blank 98 label.
- The scanned value appears in the second top menu row (usually blinking).
- Click Assign on the target Item row.
Method B: Assign first, then Scan
- Click Assign on the target Item row.
- The row starts blinking and waits for input.
- Scan the blank 98 label to attach it.
Whether a label is printed (97) or assigned (98), the final result is the same visually: it will appear on the Item row as a label chip.
Quick stats panel (left side)
On the left of the table, the Statistics panel shows daily performance for the currently logged-in user on the Assignation page.
Common fields:
- Total orders
- Total items: count of printed (97) labels
- Total assigned: count of assigned (98) labels
Related pages
- Orders → Drop (fast intake and quick print/assign in many setups)
- Orders → Management (search, reporting, and advanced actions)
- Customers & Vendors (ownership / customer changes, depending on your workflow)